Чистая установка windows 10 с помощью загрузочного носителя
Содержание:
- Скачиваем оригинальный образ Виндовс 10 через Rufus
- Download Windows 11 Media Creation Tool
- Create Installation Media For Another PC Option
- Создание загрузочной флешки Windows 10 в Media Creation Tool
- Что вы должны знать, прежде чем идти вперед
- Upgrade to Windows 11 using Media Creation Tool
- Download Windows 11 Media Creation Tool
- Обновление или восстановление Windows 10 с помощью Media Creation Tool.
- Windows 10 Media Creation Tool FAQ
- How to download the Windows 10 Media Creation Tool
- What is Media Creation Tool?
- Как пользоваться
- Как установить Windows 10 на компьютер и на ноутбук.
- Create an Installation Media or Download ISO file
Скачиваем оригинальный образ Виндовс 10 через Rufus
 Большинство пользователей используют Rufus для создания загрузочных флешек, но то, что она позволяет скачивать с официального сайта ISO-образы Win 10 и 8.1 знают немногие. Инструкция по загрузке ⇒
- Скачиваем программу Rufus. Подойдет любая версия (портативная, не требующая установки или обычная). Обязательно соглашаемся на автоматическое обновление. Это поможет избежать проблем при запуске загрузки дистрибутива OS. Запускаем ее.
- Справой стороны основного окна программы находим вкладку “Выбрать”, раскрываем ее и жмем ссылку “Скачать”. Бывает что сразу ссылка не срабатывает. В этом случае перезапустите руфус. Если не заработало, то возможно ваш антивирус или файрволл блокируют доступ в интернет программе. Надо дать разрешение. Без этого загрузка будет не возможна. Из-за того, что скрипт загрузки операционки часто не срабатывает, этот способ меня не устраивает.
- Выберете требуемую Виндовс – 10 или 8.1.
- Далее устанавливаете релиз, издание, язык и архитектуру.
- Скачиваем образ ISO. Это можно сделать как при помощи программы, так и с помощью браузера, установив флажок. Если качаете руфусом, то нет возможности нажать на паузу, а браузер это может. Вот и все отличия.
В общем программа хороша. Она позволяет сразу скачать нужную версию операционной системы и сделать установочный накопитель. Дополнительный плюс – можно загружать более старые копии образов Виндовс, которые нужны для восстановления того же релиза на настольных ПК и ноутбуках.
Download Windows 11 Media Creation Tool
First of all, make sure you have registered in the Windows Insider program. To download the official file, you will need a Windows Insider account, So make it first. Now go to this official page and download the Windows 11 installation media. Click on Windows 11 icon and then click on the download tool now. Your Windows 11 Installation media will be now downloaded successfully in minutes (depending upon your network speeds).
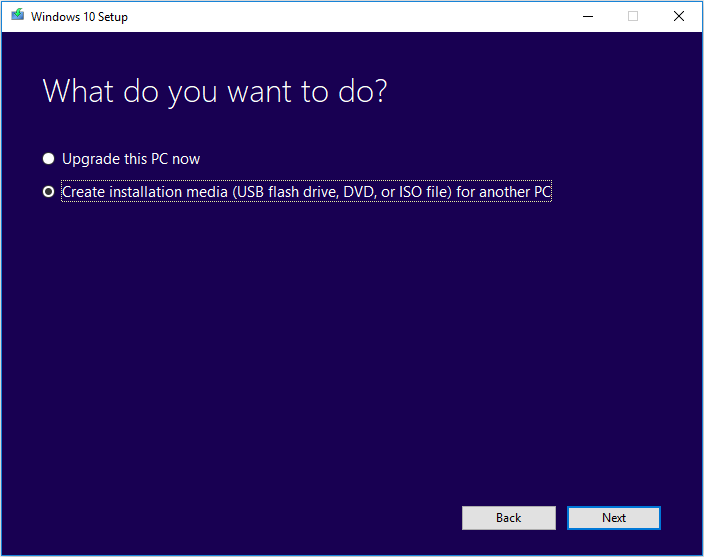
After installing the file, run it on your PC system. After this, you’ll get a prompt saying “Getting a few things ready!”. Now, you’ll see two options: “Upgrade the PC Now” and “Create Installation Media (USB flash drive, DVD, or ISO file) for another PC”.
You can choose the option accordingly, if you choose “Upgrade the PC Now”, then your system will be upgraded to Windows 11. While, on the other hand, if you choose “Create installation media” then it will create a bootable file instead of upgrading your system.

Upgrade the PC Now
If you choose the “Upgrade the PC Now” option, then the Media Creation tool will start downloading the Windows 11 File and upon downloading successfully, you will be able to install it in your system. After successful installation, complete the setup and you will be now able to run Windows 11 in your system seamlessly.
Create Installation Media
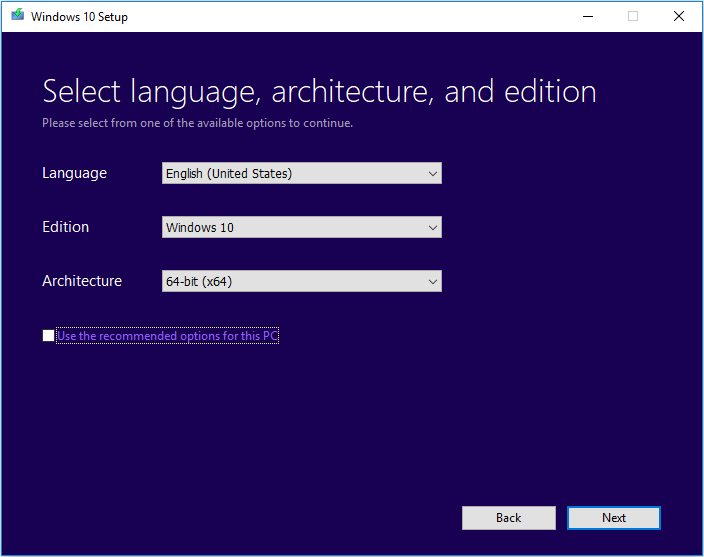
If you choose the option “Create installation media.” then you will now get a prompt asking for language, edition, and architecture details of your system. Make sure to enter the details correctly and also you can choose the option “Use the recommended option for the PC!”. It will automatically select the option compatible with your system.
Now click on Next and you’ll get two options namely “Create USB flash drive” and “ISO file”. In create a USB flash drive option, it will create a bootable USB drive for you. And if you choose the second option, you will be able to burn the ISO file later to create a bootable USB drive or a DVD.
- If you select the “Create USB Flash drive” option, then make sure to connect the USB. The tool will automatically download and burn into the US connection. And you can flash it later.
- For the “ISO File” option, it will download the ISO file of Windows 11 and you’ll later have to burn it using any third-party apps to make it bootable.
We recommend you to use the “Create USB Flash Drive” option here, as it is easier to use.
Ready to Install
After creating the bootable Windows 11, plug the USB Drive in which you’ve installed the bootable file. Boot the PC into BIOS and install the system. You can now use Windows 11 seamlessly if you have followed all the steps mentioned above correctly. You can read our “types of Windows 11 product key”, “Password Reset”, and TPM 2.0 Bypass” article here.
Create Installation Media For Another PC Option
If you select ‘Create installation media for another PC option’, then follow the steps given below-
When you select the option, you will be asked to select the language, edition, and architecture of the Windows you want to install. You can click ‘Use the recommended options for this PC,’ if you want the Media creation tool to automatically select the options for the machine. Once done, click on next.

-
Next, you will see two options on the window- ‘USB flash drive,’ and ‘ISO file.’
- USB flash drive- If you select this option, the Windows media creation tool will create a bootable USB drive for you.
- ISO file- If you select this option, the media creation tool will download the ISO file. You will be able to burn the ISO file later to create a bootable USB drive or a DVD.
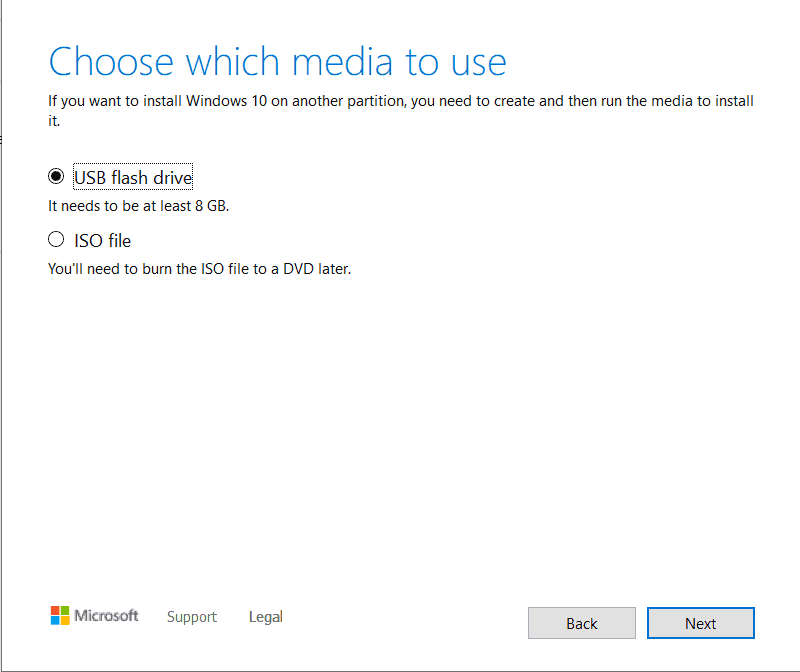
- If you select the ‘USB flash drive’ option, ensure you connect a USB drive that is at least 8GB in storage. The media creation tool will begin downloading the Windows 11 and will burn it to the USB flash drive automatically.
- If you select the ‘ISO file’ option, the ISO file of Windows 11 will be downloaded. You can later burn it with the help of burning tools like Power ISO. You can use such tools to burn the ISO file to a USB drive.
- Once you have created the bootable USB drive of Windows 11, plug the USB drive into the computer which you want to upgrade to Windows 11.
- After plugging in the USB drive, boot into BIOS and install the Windows.
ALSO READ: How to Upgrade Windows 10 to Windows 11
Создание загрузочной флешки Windows 10 в Media Creation Tool
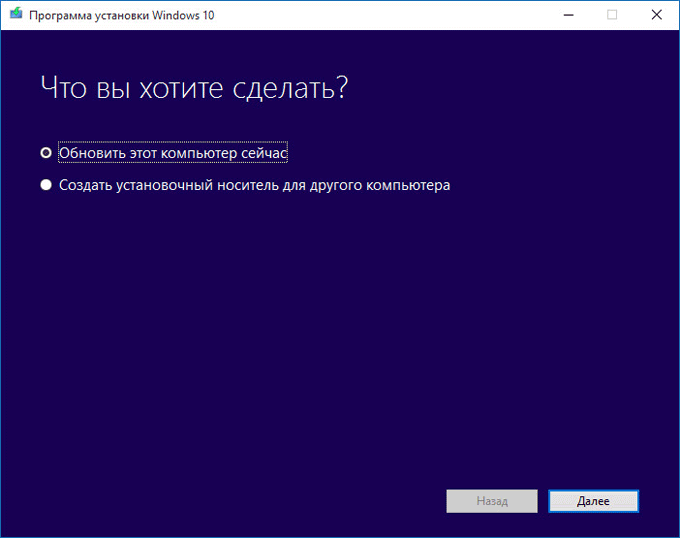
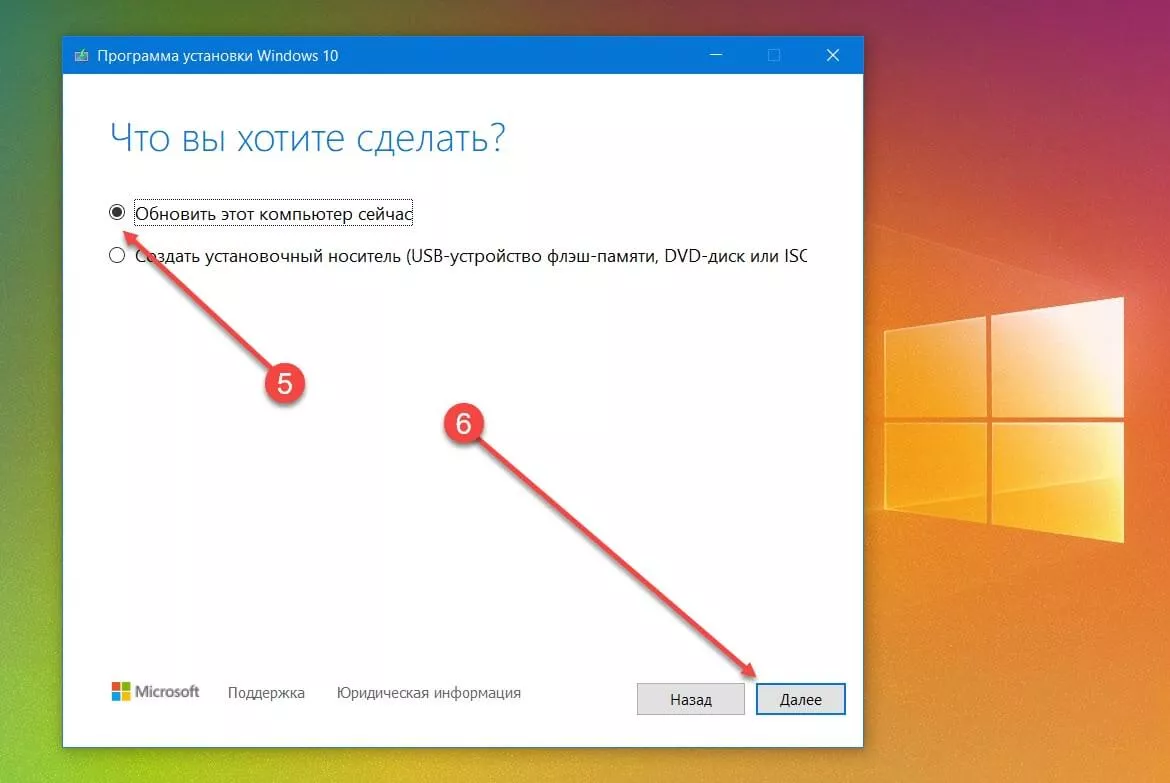
После запуска Media Creation Tool (Программа установки Windows 10), откроется окно «Что вы хотите сделать?». В этом окне вам предложат на выбор совершить два действия:
- Обновить этот компьютер сейчас.
- Создать загрузочный носитель для другого компьютера.
При выборе бесплатного обновления, на ваш компьютер будет скачана Windows 10, а затем произойдет обновление системы до Windows 10.
Если вы выберите пункт «Создать загрузочный носитель для другого компьютера», то вы можете записать DVD диск с операционной системой, или создать загрузочную флешку, для установки Windows 10 на свой или любой другой компьютер.
Обратите внимание на то, что если на данном компьютере вы будете устанавливать Windows 10 в первый раз, то вам потребуется ключ продукта Windows. Это касается установки Windows 10 с загрузочного устройства
При обновлении системы ключ продукта не потребуется, потому что система будет активирована автоматически.
Если вы будете переустанавливать Windows 10 на том компьютере, где уже было проведено обновление системы, при новой установке системы вам нужно будет пропустить ввод ключа во время установки. После завершения установки, операционная система будет активирована автоматически.
При помощи Media Creation Tool, я создам загрузочный носитель. Для этого необходимо будет активировать пункт «Создать загрузочный носитель для другого компьютера».
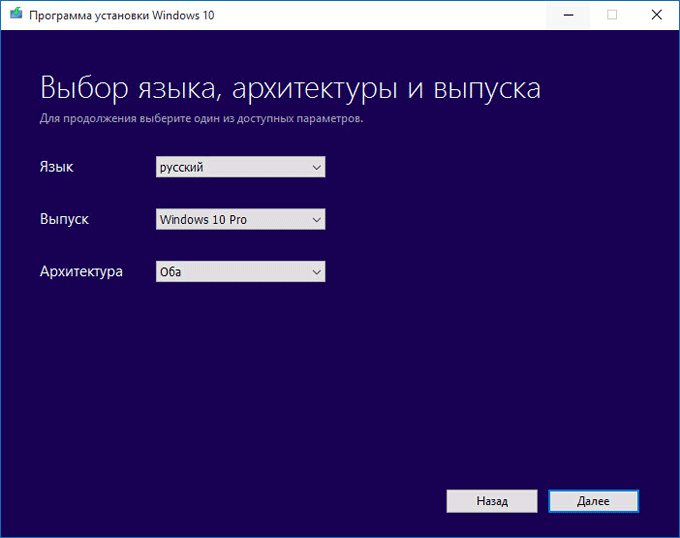
В следующем окне «Выбор языка, архитектуры и выпуска», вам нужно будет выбрать один из доступных параметров:
В случае выбора варианта из двух разрядных систем, на внешний носитель будет записана Windows 10 соответствующего выпуска, имеющая две разрядности: 64 и 32 бит. При установке Windows 10 на компьютер, вы можете выбрать, какую именно систему: Windows 10 x64, или Windows 10 x32 следует установить на данный компьютер. Соответственно на USB носителе должно быть достаточно места для записи обоих систем.
После выбора настроек, нажмите на кнопку «Далее».
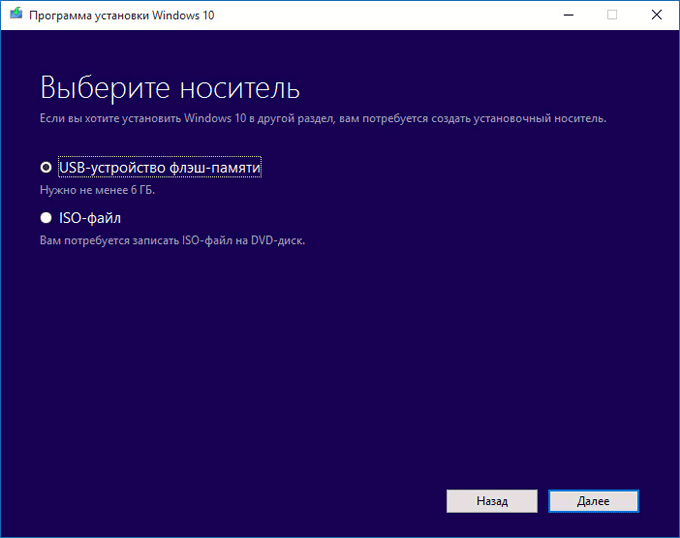
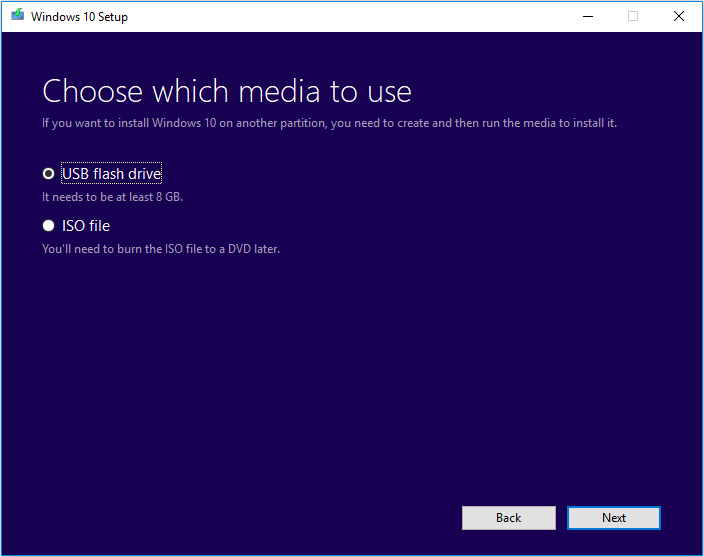
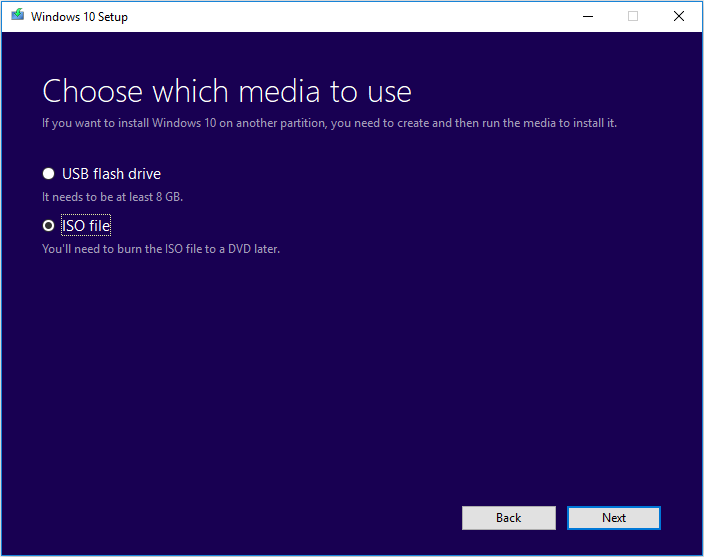
В новом окне «Выберите носитель», необходимо будет выбрать один из вариантов: «USB-устройство флэш-памяти» для создания загрузочной флешки, или «ISO-файл» для сохранения Windows 10 в виде ISO-файла, для последующей записи на DVD диск.
Так как я выбрал для записи систему с обоими разрядностями, то для этого мне понадобиться флешка объемом не менее 6 ГБ.
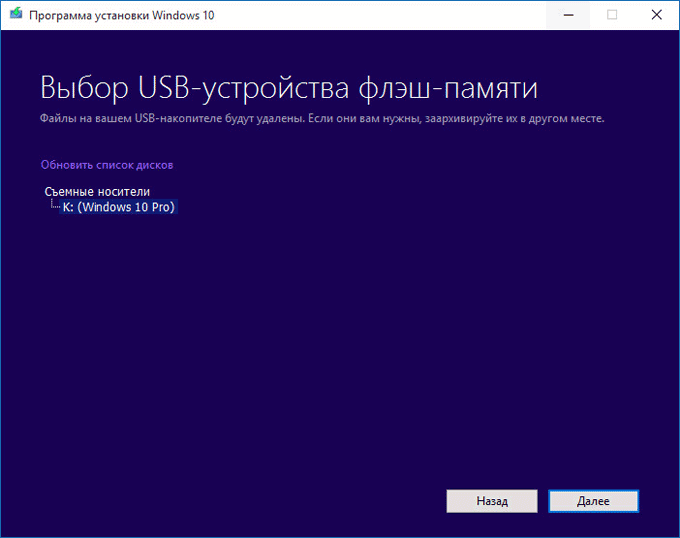
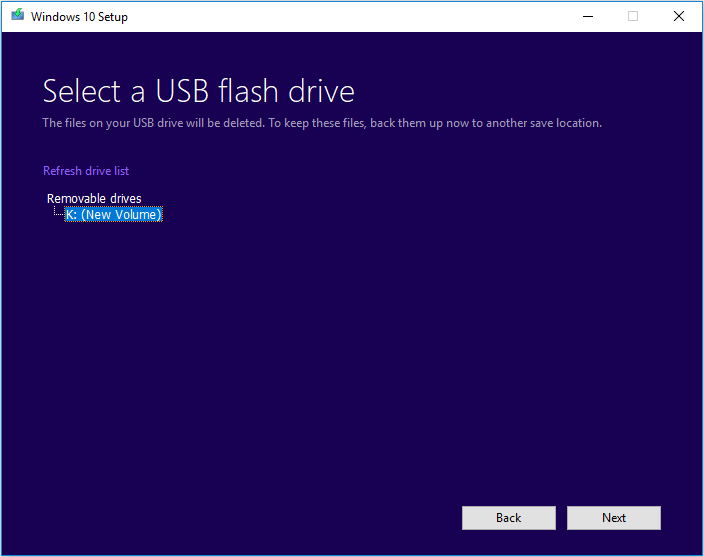
В окне «Выбор USB-устройства флэш-памяти» приложение обнаружит и отобразит флешку, которая была подключена к вашему компьютеру. Нажмите на кнопку «Далее» для запуска процесса загрузки и записи операционной системы.
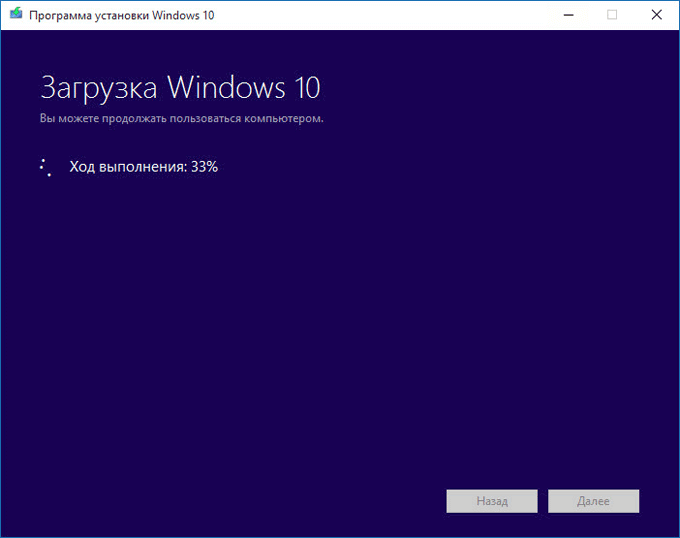
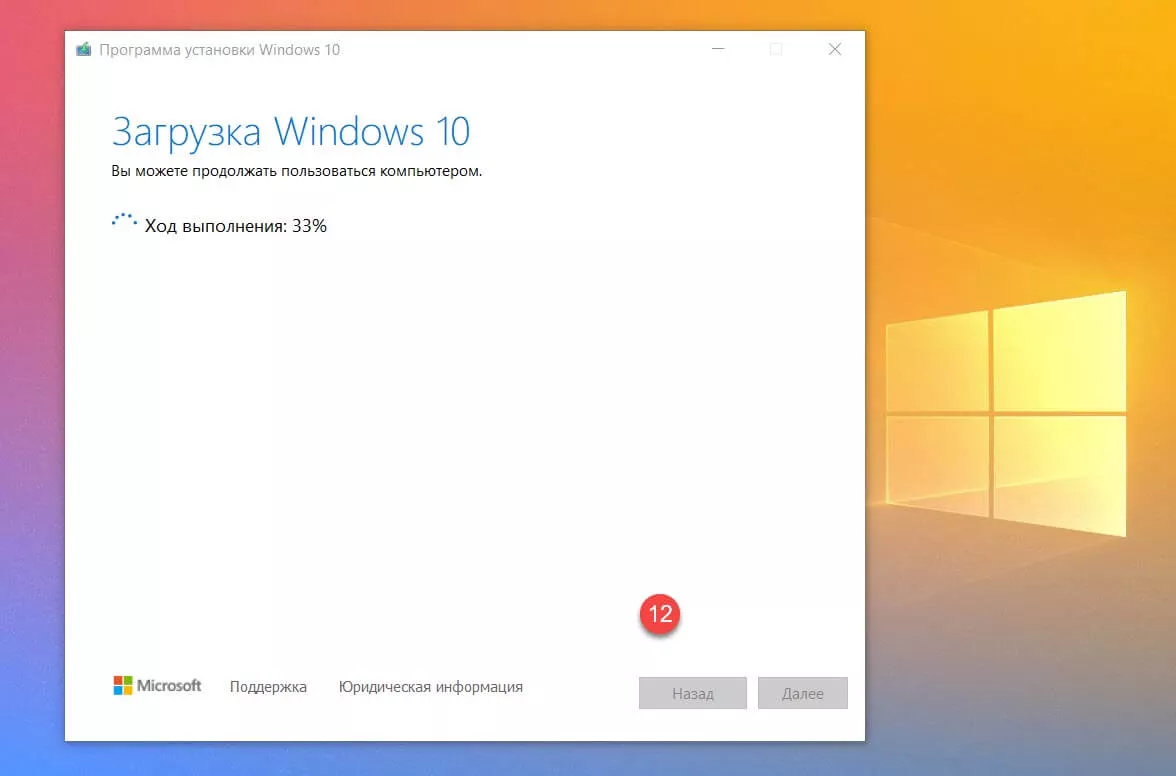
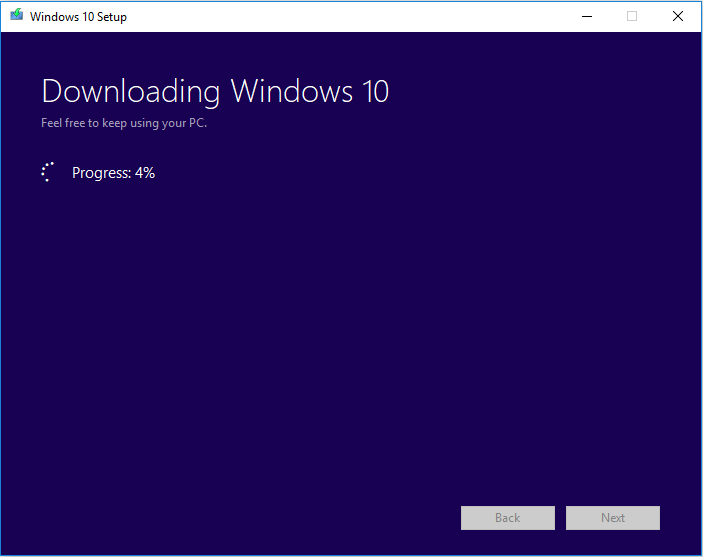
После этого, начнется загрузка Windows 10 на ваш компьютер, которая занимает некоторое время. Вы можете продолжать в это время использовать свой компьютер.
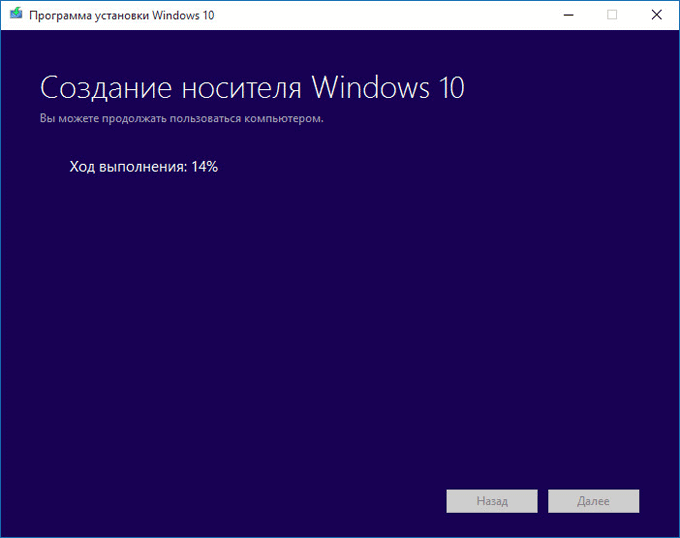
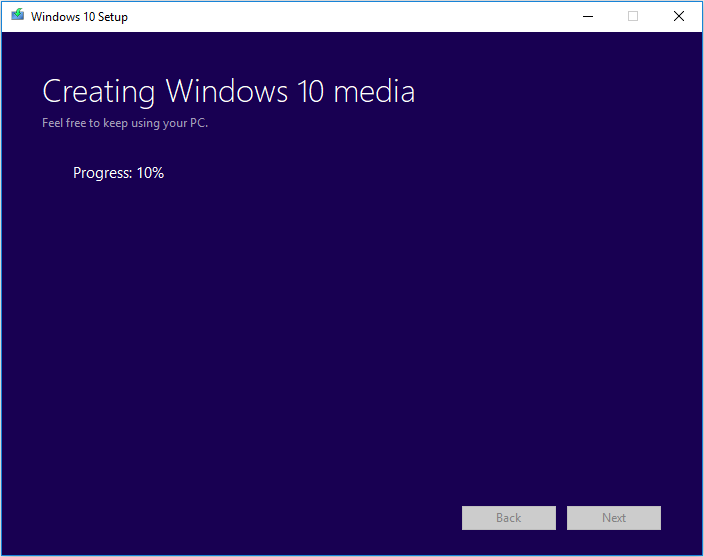
После завершения загрузки операционной системы, откроется окно «Создание носителя Windows 10».
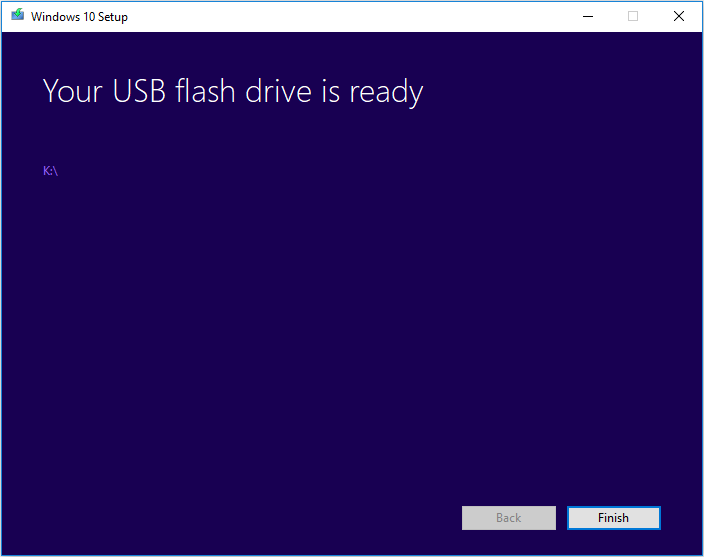
После завершения создания загрузочной флешки, будет открыто окно «USB-устройство флэш-памяти готово». Нажмите на кнопку «Готово» для выхода из приложения Media Creation Tool.
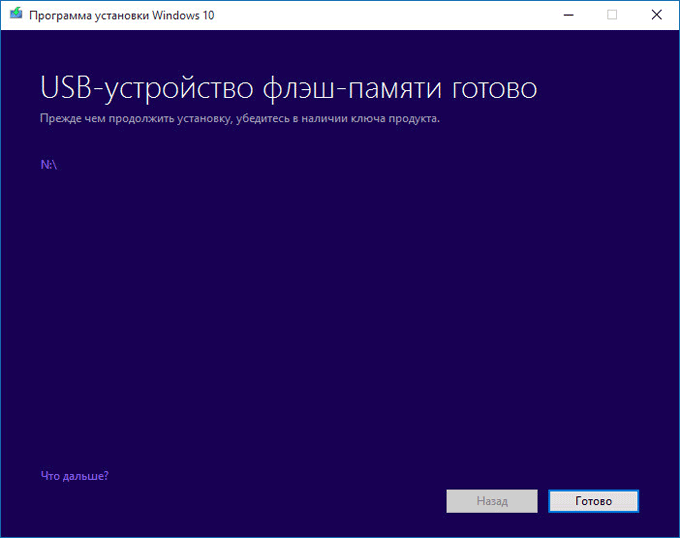
Теперь вы можете использовать загрузочную флешку с Windows 10 на своем, или любом другом компьютере.
Вам также может быть интересно:
- Обновление Windows 10 в Media Creation Tool
- Сравнение версий Windows 10: таблица
Что вы должны знать, прежде чем идти вперед
Прежде чем приступить к созданию собственного ISO-файла, карты памяти USB или DVD-диска с установкой Windows 10, необходимо сначала проверить следующие требования и рекомендации:
У вас должно быть работающее интернет-соединение, чтобы вы могли скачать установочные файлы.
На жестком диске или твердотельном диске должно быть достаточно свободного места для загруженных установочных файлов
Безопасной ставкой было бы иметь как минимум 12 ГБ свободного места.
Если вы собираетесь создать карту памяти USB, обратите внимание, что любые данные, хранящиеся на ней, удаляются, поскольку Media Creation Tool форматирует ее перед созданием загрузочной карты памяти с установкой Windows 10.
Если вы хотите создать носитель с установкой Windows 10, вам нужно использовать DVD или карту памяти USB объемом не менее 8 ГБ.
Если вы собираетесь обновить свой текущий компьютер или устройство, убедитесь, что оно соответствует системным требованиям. Вы можете проверить их здесь: Спецификации Windows 10.
Upgrade to Windows 11 using Media Creation Tool
Chandan Pandit
September 3, 2021 11:20 PM
Windows
The beta build of Windows 11 has started rolling out to Windows Insider users. Windows 11 brings many improvements over the normal Windows 10 such as a new redesigned home interface, a new Microsoft store with native support for Android apps, a re-touched taskbar and icons, and more. The stable rollout of Windows 11 might happen in late 2021 or early 2022. Many users are willing to try Windows 11 on their PC, but they are not officially eligible for that. Well, for those, Windows 11 Media Creation is a helpful tool. The Media Creation tool can upgrade its system to Windows 11 seamlessly.
The Windows Media Creation tool allows users to sideload Windows 11. It’s more like flagship a custom ROM in Android with the help of TWRP recovery. For some sets of people, the creation tool is easy to use and operable, but it might come out as a bit complicated for beginners. So, in this post, we’ll de deciding on How to upgrade your system to Windows 11 using Windows 11 Media Creation Tool.
Important steps before proceeding
- After installing Windows 11 using the Media Creation tool, all of your user data might get cleared. So, make sure to take the backup of your data, so you won’t face any problem if your user data gets cleared.
- A good network connection is always recommended. It’s must require to install Windows 11 and to create a bootable USB Drive.
- If you’re creating the bootable USB instead of installing Windows 11, a USB Drive with a minimum of 8GB of RAM is always suggested.
Download Windows 11 Media Creation Tool
First of all, make sure you have registered in the Windows Insider program. To download the official file, you will need a Windows Insider account, So make it first. Now go to this official page and download the Windows 11 installation media. Click on Windows 11 icon and then click on the download tool now. Your Windows 11 Installation media will be now downloaded successfully in minutes (depending upon your network speeds).
After installing the file, run it on your PC system. After this, you’ll get a prompt saying “Getting a few things ready!”. Now, you’ll see two options: “Upgrade the PC Now” and “Create Installation Media (USB flash drive, DVD, or ISO file) for another PC”.
You can choose the option accordingly, if you choose “Upgrade the PC Now”, then your system will be upgraded to Windows 11. While, on the other hand, if you choose “Create installation media” then it will create a bootable file instead of upgrading your system.
Upgrade the PC Now
If you choose the “Upgrade the PC Now” option, then the Media Creation tool will start downloading the Windows 11 File and upon downloading successfully, you will be able to install it in your system. After successful installation, complete the setup and you will be now able to run Windows 11 in your system seamlessly.
Create Installation Media
If you choose the option “Create installation media.” then you will now get a prompt asking for language, edition, and architecture details of your system. Make sure to enter the details correctly and also you can choose the option “Use the recommended option for the PC!”. It will automatically select the option compatible with your system.
Now click on Next and you’ll get two options namely “Create USB flash drive” and “ISO file”. In create a USB flash drive option, it will create a bootable USB drive for you. And if you choose the second option, you will be able to burn the ISO file later to create a bootable USB drive or a DVD.
- If you select the “Create USB Flash drive” option, then make sure to connect the USB. The tool will automatically download and burn into the US connection. And you can flash it later.
- For the “ISO File” option, it will download the ISO file of Windows 11 and you’ll later have to burn it using any third-party apps to make it bootable.
We recommend you to use the “Create USB Flash Drive” option here, as it is easier to use.
Ready to Install
After creating the bootable Windows 11, plug the USB Drive in which you’ve installed the bootable file. Boot the PC into BIOS and install the system. You can now use Windows 11 seamlessly if you have followed all the steps mentioned above correctly. You can read our “types of Windows 11 product key”, “Password Reset”, and TPM 2.0 Bypass” article here.
Обновление или восстановление Windows 10 с помощью Media Creation Tool.
- Перейдите на страницу загрузки Media Creation Tool
- На странице нажмите кнопку «Скачать средство сейчас» и сохраните приложение в любой удобной вам папке.
- Запустите инструмент Media Creation Tool.
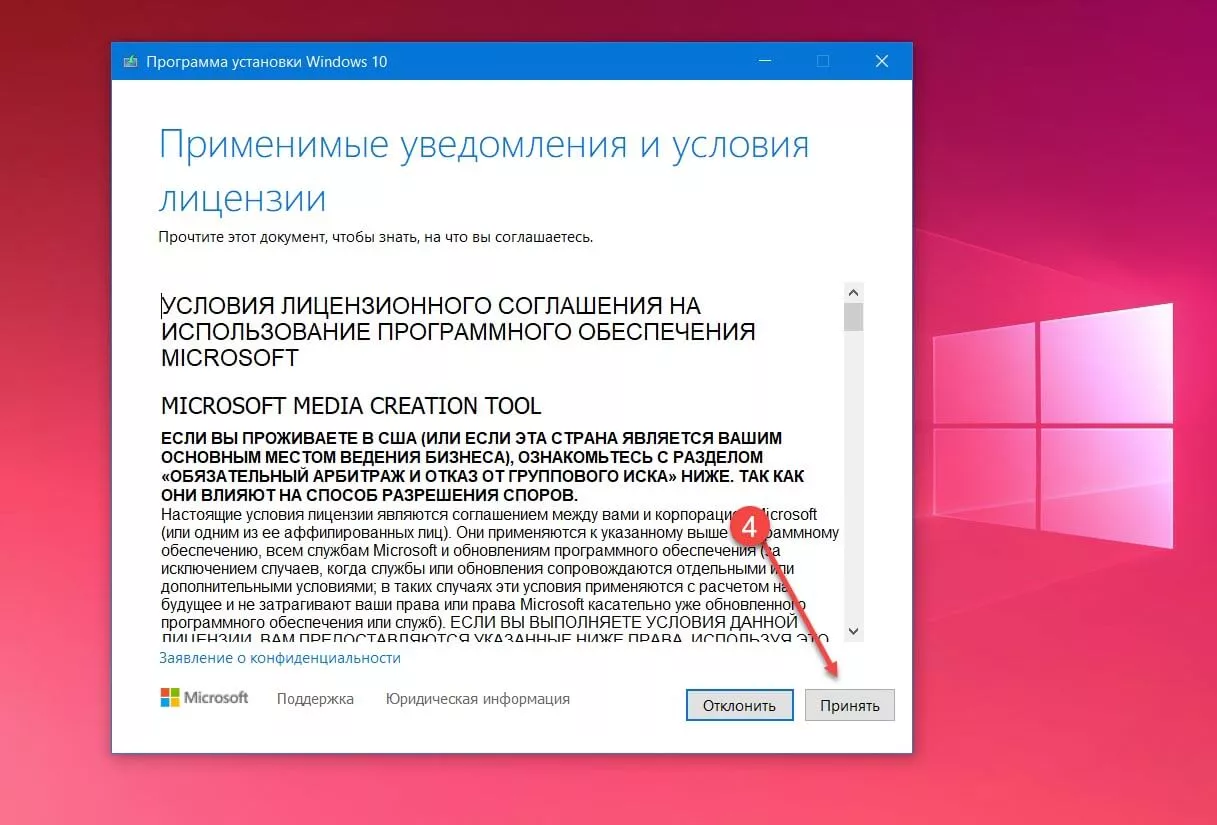
- Примите условия лицензионного соглашения, кнопка «Принять».
- Выберите «Обновить это устройство сейчас» и нажмите «Далее».
Утилита выполнит загрузку установочных файлов на серверах Microsoft.
Media Creation Tool сохраняет ваши персональные файлы и приложения и устанавливает Windows 10 Домашняя (или Pro, в зависимости от вашей старой системы). Выполняется обновление компьютера, никакие данные не стираются.
- Снова примите условия лицензионного соглашения, кнопка «Принять».
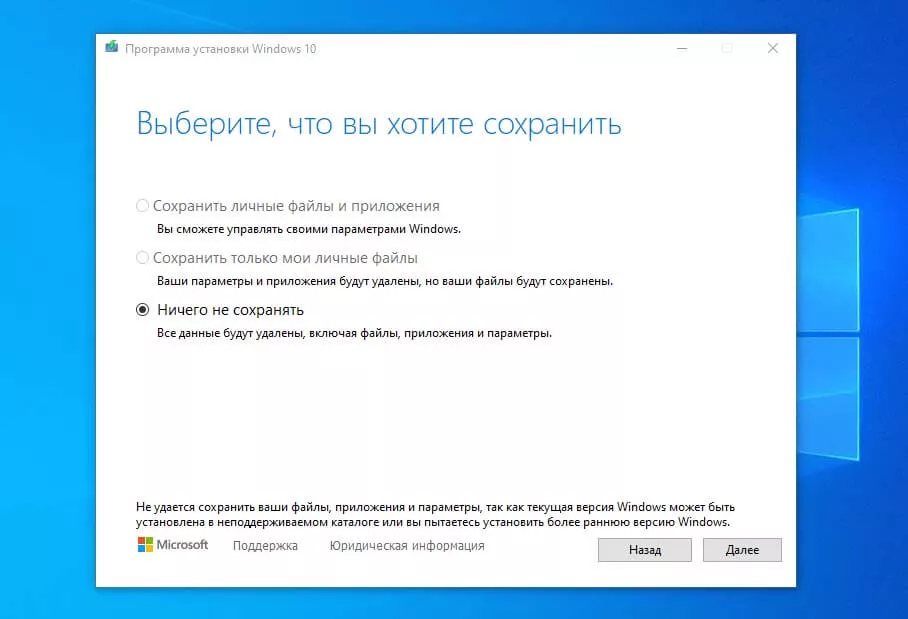
- Выберите что вы хотите сохранить и нажмите «Далее»:
- Сохранить личные файлы и приложения
- Сохранить только мои личные файлы
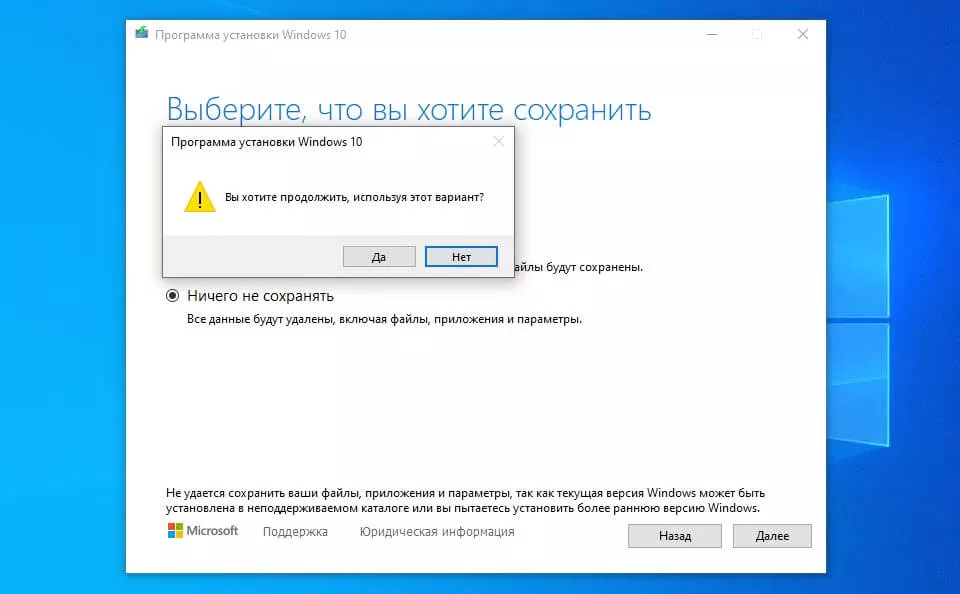
- Ничего не сохранять
- Подтвердите свои действия нажав кнопку «Да».
- Система проверит и установит последние обновления.
- В окне «Готово к установке» нажмите кнопку «Установить».
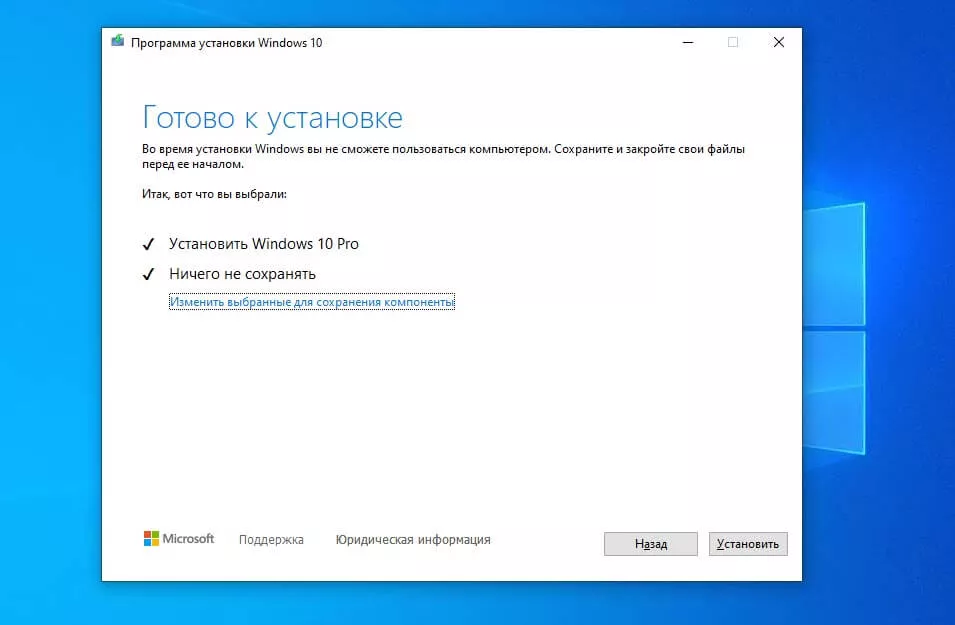
Приложение установит файлы и автоматически перезагрузит компьютер. После перезагрузки инициализируется процесс настройки операционной системы.
Все! Надеюсь эта информация пригодится.
Рекомендуем: Загрузочная флешка Windows 10 с помощью командной строки.
Windows 10 Media Creation Tool FAQ
How do I get Windows 10 media creation tool?
You can get Windows 10 media creation tool by visiting the Microsoft Media Creation Tool website. Then click the Download tool now button from the webpage. Then install and run the application on your PC. After that, you can choose to create installation media for another PC or upgrade Windows 10 with Windows 10 media creation tool.
How do I upgrade to Windows 10 using media creation tool?
First, visit the Microsoft support website. Click the Download tool now button on the page. Run the Media Creation Tool and click the Accept button to agree to the terms. On What do you want to do page, select Upgrade this PC now and click Next. Then follow the prompt to complete upgrade to Windows 10.
How do I create a bootable USB using Windows 10 media creation tool?
Prepare a blank USB flash drive with at least 8 GB and connect it to your PC. Download the free Windows 10 media creation tool from the Microsoft’s official website and run the tool. On the What do you want to do page, select Create installation media for another PC. Then select language, Windows Edition, and Architecture for the installation media. On Choose which media to use page, select USB flash drive and follow the prompts to create the bootable USB drive.
What is Windows 10 media creation tool?
Windows 10 Media Creation Tool is a free utility developed by Microsoft, which lets you create a Windows 10 installation USB drive or download its .ISO file that you can burn on to a DVD to install the operating system on a different computer. With Windows 10 creation tool, you can upgrade Windows to its latest version or create a Windows 10 installation USB drive/DVD disc to install Windows 10 or repair a Windows PC.
How to download the Windows 10 Media Creation Tool
If you’re wondering what the Windows 10 Media Creation Tool is, here’s the answer: a small executable file made by Microsoft, that allows you to download Windows 10 and create your installation media both on USB devices or in an ISO file. Furthermore, the Windows 10 Media Creation Tool also lets you directly upgrade your current computer or device to the latest version of the operating system.
The next question you might ask is: «How do I get Windows 10 Media Creation Tool?» To download the Media Creation Tool, open your favorite web browser and go to this webpage: Download Windows 10. Scroll until you reach the «Download tool now» button found in the «Create Windows 10 installation media» section.

Download the Windows 10 Media Creation Tool
Microsoft asks you to download an executable file called MediaCreationTool21H1.exe, with a size of 18.5 MB. The file name ends with the version number of the latest Windows 10 update. In our case, 21H1 is the version number for Windows 10 with May 2021 Update. Save the executable file for the Windows 10 Media Creation Tool somewhere on your PC and then run it with a double-click or double-tap.

Double-click on MediaCreationTool21H1.exe
When you see the UAC prompt on your screen, choose Yes to allow the MediaCreationTool21H1.exe to run.

UAC asks your approval to run the Media Creation Tool
Depending on what you want to do, read the next section of this tutorial or the one after it.
TIP: The future versions of the MediaCreationTool21H1.exe file and of Windows 10 will have a different version number at the end. To learn more about Windows 10 versions, read: How to check the Windows 10 version, OS build, edition, or type.
What is Media Creation Tool?
Windows 10 Media Creation tool has two functions:
- Upgrade the PC which has already installed Windows 10
- Create installation media (USB flash drive, DVD) for another PC or simply download the latest Windows 10 ISO file.
Windows Update Assistant is another tool which can be used to upgrade the PC seamlessly but I prefer the media creation tool. If you want to upgrade your PC to the latest version of Windows 10, you should select the first option. And if you want to create a bootable USB/DVD, then you should select the second option.
The only problem with the Media Creation Tool is that it will try to download the Windows 10 setup every time you want to create a bootable USB/DVD. This is the default behavior.
Как пользоваться
Кликните два раза мышкой по инсталляционному «exe» файлу, согласитесь с лицензией. Программа предложит обновить ОС или создать установочный носитель. Выбираем второй вариант.
Укажите версию ОС для записи. Приложение предлагает установить образ Windows 10 Pro. Выберите разрядность.
У меня программа правильно установила архитектуру — x64 разрядная. При выборе варианта «ISO-файл», образ ОС запишется на HDD. Далее самостоятельно запишите его на диск. Как это сделать подробно рассматривалось в статье «Создайте образ программой UltraISO». Мы выберем вариант «Устройство флэш-памяти».

Запустится установка и последующая запись ее на флешку. Это занимает продолжительное время.
После завершения установки нажимаем кнопку «Готово». Создастся накопитель с оригинальной Windows 10. Используйте его для установки на ПК, или восстановления работоспособности системы.
О создании загрузочной флешки посмотрите в статье «Утилита WINToBootic — как пользоваться».
Как установить Windows 10 на компьютер и на ноутбук.
Чтобы установить виндовс 10, что на ноутбук, что на стационарный компьютер, нужно выполнять абсолютно одни и те же действия, так что инструкция будет одинаковая.
Если все описанное выше вы сделали правильно, то после того как вы вставили диск в дисковод, настроили BIOS, и включили (или перезагрузили компьютер) у вас должно выскочить вот такое окно

Тут выбираете все по стандарту. Ничего сложного нет. Далее выскочит такое окно. Нажимаем Установить

На следующей картинке предлагается ввести ключ. Если у вас его нет, то нужно выбрать – У меня нет ключа продукта.

Если же у вас уже была установлена легальная версия виндовс 10, и вы просто её переустанавливаете по какой-то причине, то привязка ключа выполниться автоматически после установки. После, нужно выбрать версию системы, которую вы хотите установить. Если вы не знаете что выбрать, выбирайте Домашнюю.

Далее добровольно-принудительно соглашаемся с условиями

Теперь вам предложется выбрать Тип установки. Нам нужен пункт, «Выборочная: только установка Windows (для опытных пользователей)». Не бойтесь фразы “для опытных пользователей”, дальше вы поймете, что сложного там нет абсолютно ничего

После откроется окно «Где вы хотите установить Windows?»
И тут есть два варианта:
- Вы удаляете все. И устанавливаете систему на чистый и пустой компьютер (это самый лучший вариант). Но до этого не забудьте скопировать нужную информацию на внешние носители (диски, флешки и д.т.), т.к. удалено будет все.
- Вам нужно сохранить то, что храниться на НЕ системном диске (ваши личные фото, видео и т.д.), а старую виндовс удалить.
В первом случае, в окне «Где вы хотите установить Windows?», вам нужно отформатировать все диски, которые там есть, называться они будут примерно так “Диск 0 Раздел 1”, “Диск 0 Раздел 2” выглядеть они будут так

Вам нужно выбрать мышкой сначала первый диск, и нажать “Удалить”, после этого тоже самое сделать со вторым, и со всеми остальными. После всех этих манипуляций у вас останется только одна строка “Незанятое пространство на диске 0”

Теперь все пространство, которое у вас есть на жестком диске, нужно разделить на две части: системную и для всего остального :). Системный диск должен быть не меньше 20 Гигабайт для нормальной работы системы. Но обычно выбирается больше. Сейчас у меня диск на 1 Терабайт (1024 гигабайта), из них 200 Гб идут на систему и разные программы, а 800 с лишним Гб, на все остальное.
Чтобы разбить пространство на две части, выбираем “Незанятое пространство на диске 0” правой кнопкой мыши и нажимаем на слово Создать. Выбираем где-то 1/5 часть диска, но не меньше 20 Гб. Только помните, что при выборе размера диска все меряется в Мегабайтах, а 1 Гигабайт = 1024 Мегабайтам. Т.е. чтобы разбить диск на две части, так как показано на предыдущем рисунке, нужно выбрать мышкой “Незанятое пространство на диске 0″, после нажать Создать, в появившемся поле выбрать размер – 27545 Мегабайт (это 26,9 Гигабайт), после нажимаете Применить. Второй раз проделываете туже процедуру, выбираете оставшийся размер и нажимаете Применить. Можно распределить практически все пространство. После первого разбития, какую-то часть система оставит для себя. Все остальное пространство вы можете потратить на второй диск.
Вообще вы можете разбить память насколько угодно дисков, но обычно делается всего два. ОДНАКО! Мастера советуют, если ваше Незанятое пространство составляет 100 Гигабайт и меньше, разбивать его не имеет смысла (выше я показал просто пример ). В таком случае вы НИЧЕГО не создаете и не разбиваете, просто выбираете Незанятое пространство и нажимаете Далее.
Во втором случае, вам нужно выбрать мышкой только системный диск, т.е. тот на котором была установлена старая винда и диск, и диск где будет написано Зарезервировано системой (выделены зеленым). И нажать на слово “Форматировать“. Естественно по очереди

Как только отформатируете необходимые диски, на тот, где НЕТ фразы Зарезервировано системой, можно устанавливать свежую операционку. Далее инструкция для первого и второго случая совпадают.
После того как вы “разобьете” всю память, нажмите левой кнопкой мыши на диск, который вы делали поменьше (или на диск который вы форматировали, для второго случая), и нажмите на кнопку Далее.
После начнется процесс установки. С компьютером начнут происходить страшные вещи – будет тухнуть экран, он будет перезагружаться и т.п. Это нормальный процесс установки.
В общем, у нас получилось установить виндовс 10. Однако, это не все. Нужно произвести настройки, которые идут сразу после установки. Формально они тоже считаются установкой.
Create an Installation Media or Download ISO file
Another function of Window 10 Media Creation Tool is that it can help you create an installation media for another PC or download ISO file. And all Windows 10 editions are available when you select Windows 10, except for Enterprise edition. When finished, you can use the bootable USB drive or DVD disc to install Windows 10.
Note: Before you install or reinstall Windows on your PC, remember to back up important files on your system disk.
Before you download Windows 10 Media Creation tool, make sure you have:
- A PC with a working Internet connection
- A blank USB flash drive or DVD with at least 8 GB of available storage space
- A product key if you’ve not installed Windows 10 before or if you want to perform a clean install
Now you can follow the steps as below to create Windows 10 installation media (USB flash drive or DVD) and use it to install a new copy of Windows 10, perform a clean installation, or reinstall Windows 10.
Step 1. Download Windows 10 Media Creation Tool and follow the instruction to get the following page. Then, check the second option Create installation media (USB flash drive, DVD, or ISO file) for another PC and click Next.
Step 2. Choose the Language, Windows Edition, and Architecture that you want to use for creating the installation media. After selection, then click Next to continue.
You can also choose to Use the recommended options for this PC, which automatically selects the language, edition, and architecture that match the PC that you are using right now.
Step 3. Choose what kind of media storage device you want to use. Here I take USB flash drive as an example. Choose USB flash drive and press Next.
Step 4. Select the USB drive you want to use for creating Windows 10 installation media and click Next.
Step 5. Then Microsoft Media Creation Tool starts to download the latest Windows 10 installation files on your computer or device.
Step 6. When the download is completed, it will start to create Windows 10 media.
Step 7. When it is done, click Finish and then you can use that drive to boot up your computer and install Windows 10.
If the computer that you want to install Windows 10 has a DVD player, you can also select ISO file to burn the ISO file to a DVD later.
Just follow the step-by-step prompts on the Media Creation Tool to download Windows 10 installation files and save the ISO file to a specific location. When it is finished, you can burn the ISO file to a DVD.