5 css свойств для изображений, которые вам необходимо знать
Содержание:
- Supported Image Formats
- The new loading attribute
- Controlling Image Width
- Размеры изображения
- Изображения в качестве фона.
- The Problem: Different Resolutions and Screen Sizes
- HTML Теги
- HTML Ссылки
- HTML Теги
- HTML Теги
- Атрибут alt
- HTML Справочник
- HTML Теги
- Адаптивная ширина изображения
- Image Modal (Advanced)
- Image Modal (Advanced)
- Code Example
- Using the tag
- Deprecated attributes
- Атрибуты
- Responsive Image Gallery
- HTML Reference
- HTML Tags
- Как вставить изображение в HTML?
- Definition and Usage
- Как вставить картинку в HTML
- Code Example
- The text
- The description — Users
- The description — Search Engines
- Values of the Attribute
- All Attributes of Element
- Вписывание картинки в область
Supported Image Formats
Image file formats are standardized means to organize and store digital images. An image file format may store data in an uncompressed format, a compressed format (which may be lossless or lossy), or a vector format. (Wikipedia).
Each user agent supports different image formats. Here is the list of common image formats:
| Abbreviation | File format | MIME type | File extension(s) | Browser compatibility |
|---|---|---|---|---|
| APNG | Animated Portable Network Graphics | image/apng | .apng | Chrome, Edge, Firefox, Opera, Safari |
| BMP | Bitmap file | image/bmp | .bmp | Chrome, Edge, Firefox, Opera, Safari |
| GIF | Graphics Interchange Format | image/gif | .gif | Chrome, Edge, Firefox, Opera, Safari |
| ICO | Microsoft Icon | image/x-icon | .ico, .cur | Chrome, Edge, Firefox, Opera, Safari |
| JPEG | Joint Photographic Expert Group image | image/jpeg | .jpg, .jpeg, .jfif, .pjpeg, .pjp | Chrome, Edge, Firefox, Opera, Safari |
| PNG | Portable Network Graphics | image/png | .png | Chrome, Edge, Firefox, Opera, Safari |
| SVG | Scalable Vector Graphics | image/svg+xml | .svg | Chrome, Edge, Firefox, Opera, Safari |
| TIFF | Tagged Image File Format | image/tiff | .tif, .tiff | None built-in; add-ons required |
| WebP | Web Picture format | image/webp | .webp | Chrome, Edge, Firefox, Opera |
The new loading attribute
There is a new HTML attribute that allows deferring image and iframe loading until they are close to being shown. The WHATWG has a pull request for this feature, and it is already a part of Chromium (as of v76).
Supported values for the attribute include:
- «lazy» which defers the load until the image or iframe reaches a distance threshold from the viewport.
- «eager» which loads the resource immediately.
- «auto» which is the default behavior, loads the resource.
You can use the lazy value to take advantage of browser-native lazy loading:
Lazy loading is a set of techniques in web and application development that defers the loading of resources on a page to a later point in time when those resources are needed instead of loading them upfront. These techniques help improve performance and utilization of the device’s resources reducing associated costs.
Controlling Image Width
Before the advent of CSS, the display width of an image was controlled by the attribute. This usage has been deprecated. In the absence of any CSS rules defining the display width of the image, it will still work in most browsers. However, this is specifically contrary to the HTML5 specification.
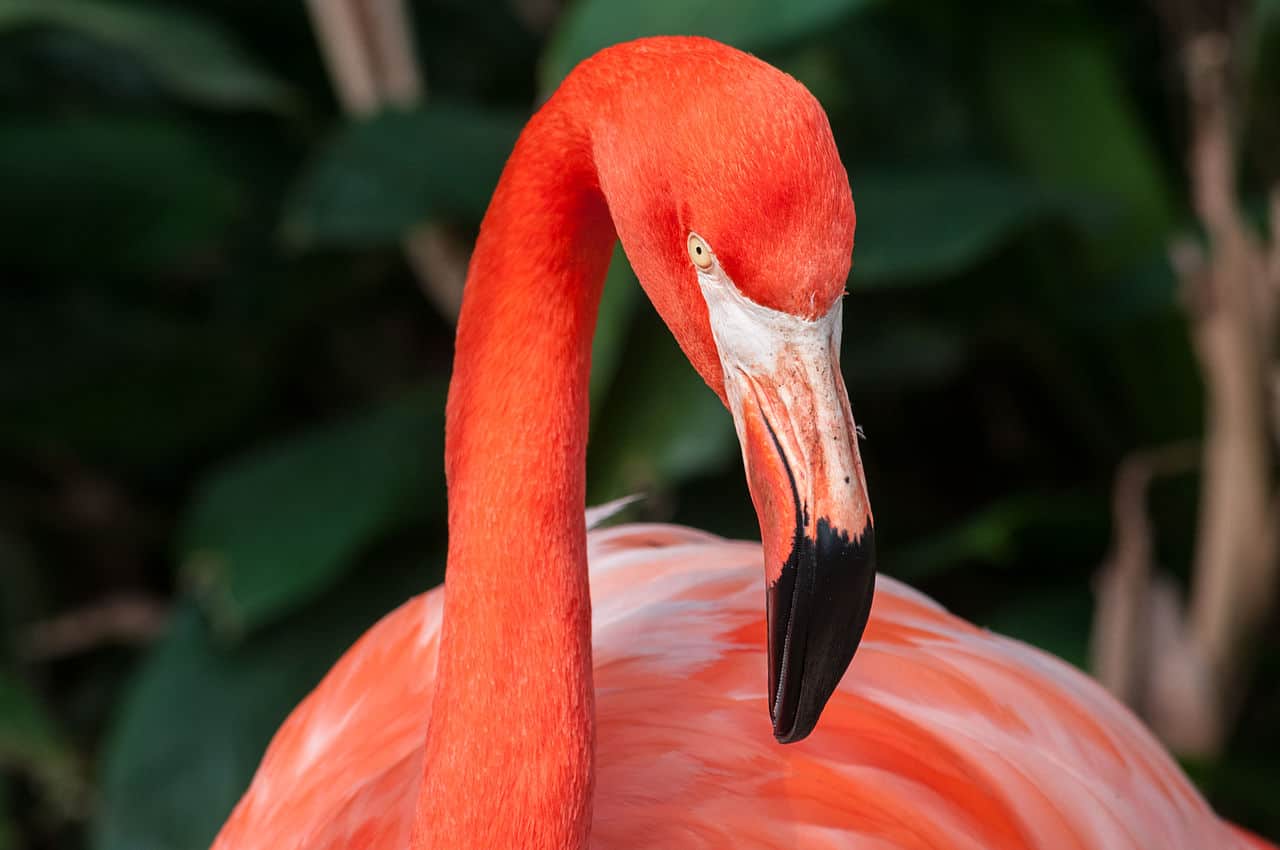
(Note: The image is much larger than 500px wide.)
For controlling how an image displays you should use CSS instead.
#fixed-width-flamingo { width: 500px; } 
Responsive Image Widths
Generally speaking, you usually don’t want to control the exact width of an image. Every visitor who comes to your website has a potentially different size screen. If you specify the width, it may be much too small for some users and much too big for others. Most of the time, the best option is to make sure that your image is inside of a responsive (percent-based) container and then let it fill the container.
#responsive-image {width: 100%;height: auto;}
If you want to ensure a fully-responsive, optimal experience for all users, you can also use to specify additional image sizes or .
Размеры изображения
Размеры изображения, отображаемого на сайте, задаются атрибутами – ширины и – высота. Если вы не укажите их, тогда картинка будет выведена в своем реальном размере. Если вы зададите только один атрибут, то второй атрибут будет вычислен пропорционально. По умолчанию единица измерения задается в пикселях, но также можно задать и проценты, например 100%. Пример указания размеров у тега :
Хотя видимый размер изображения при использовании атрибутов высоты и ширины может казаться небольшим, но фактически браузер сначала загружает первоначальную картинку и затем уже масштабирует ее в соответствии с заданными параметрами. Если у вас на сайте используются фотографии большого разрешения или загружается много фотографий, тогда это может привести к длительной загрузке страницы.
Чтобы избежать этого лучше заранее, до загрузки на сайт, уменьшить размер картинок, сделав соответствующим размерам, отображаемым на сайте.
Изображения в качестве фона.
Чтобы использовать изображение в качестве фона для всей страницы, используем свойство background для селектора html. В значении прописываем путь к изображению. Правилом хорошего тона является вместе с изображением задавать ещё и цвет фона на случай, если картинка вдруг не загрузится.
html {background: #D2BFB0 url(images/img1.jpg);
}
Повторяемость фонового изображения.
По умолчанию фоновое изображение повторяется как по горизонтали так и по вертикали. Чтобы это отменить для свойства background пишем значение no-repeat.
html {background: #D2BFB0 url(images/img1.jpg) no-repeat;
}
Чтобы картинка повторялась только по горизонтали, пишем
background: repeat-x;
по вертикали:
background: repeat-y;
Расположение фонового изображения.
Картинка в левом верхнем углу: background: left top;
В правом верхнем углу: background: right top;
В левом нижнем углу: background: left bottom;
В правом нижнем углу: background: right bottom;
По центру: background: center;
По центру вверху: background: center top;
По центру внизу: background: center bottom;
Фиксация фонового изображения.
По умолчанию фоновое изображение прокручивается вместе с контентом.
Чтобы его зафиксировать, свойству background задаём значение fixed.
html {
background: #D2BFB0 url(images/img1.jpg) no-repeat center fixed;
}
The Problem: Different Resolutions and Screen Sizes
This is probably obvious to you (we hope), but not everyone browses the internet with the same size screen. We use everything from oversized desktop monitors to tiny screens we keep in our pockets. This presents some challenges around how we deal with page design, including images.
And it isn’t just size — resolution is an issue as well. 4K HD monitors and Apple’s Retina display are packing more pixels than ever into a smaller space, and that trend is likely to continue. to make images look good on these screens, the source files need to be much larger — two, three, or even four times the size of images intended for conventional displays.
HTML Теги
<!—><!DOCTYPE><a><abbr><acronym><address><applet><area><article><aside><audio><b><base><basefont><bdi><bdo><big><blockquote><body><br><button><canvas><caption><center><cite><code><col><colgroup><data><datalist><dd><del><details><dfn><dialog><dir><div><dl><dt><em><embed><fieldset><figcaption><figure><font><footer><form><frame><frameset><h1> — <h6><head><header><hr><html><i><iframe><img><input><ins><kbd><label><legend><li><link><main><map><mark><menu><menuitem><meta><meter><nav><noframes><noscript><object><ol><optgroup><option><output><p><param><picture><pre><progress><q><rp><rt><ruby><s><samp><script><section><select><small><source><span><strike><strong><style><sub><summary><sup><svg><table><tbody><td><template><textarea><tfoot><th><thead><time><title><tr><track><tt><u><ul><var><video>
HTML Ссылки
HTML по АлфавитуHTML по КатегориямHTML Атрибуты ТеговHTML Атрибуты ГлобалHTML Атрибуты СобытийHTML ЦветаHTML ХолстыHTML Аудио / ВидеоHTML Наборы символовHTML DOCTYPEsHTML Кодирование URLHTML Языковые кодыHTML Коды странHTTP Ответы сервераHTTP МетодыPX в EM конвертерГорячие клавиши
HTML Теги
<!—>
<!DOCTYPE>
<a>
<abbr>
<acronym>
<address>
<applet>
<area>
<article>
<aside>
<audio>
<b>
<base>
<basefont>
<bdi>
<bdo>
<big>
<blockquote>
<body>
<br>
<button>
<canvas>
<caption>
<center>
<cite>
<code>
<col>
<colgroup>
<data>
<datalist>
<dd>
<del>
<details>
<dfn>
<dialog>
<dir>
<div>
<dl>
<dt>
<em>
<embed>
<fieldset>
<figcaption>
<figure>
<font>
<footer>
<form>
<frame>
<frameset>
<h1> — <h6>
<head>
<header>
<hr>
<html>
<i>
<iframe>
<img>
<input>
<ins>
<kbd>
<label>
<legend>
<li>
<link>
<main>
<map>
<mark>
<menu>
<menuitem>
<meta>
<meter>
<nav>
<noframes>
<noscript>
<object>
<ol>
<optgroup>
<option>
<output>
<p>
<param>
<picture>
<pre>
<progress>
<q>
<rp>
<rt>
<ruby>
<s>
<samp>
<script>
<section>
<select>
<small>
<source>
<span>
<strike>
<strong>
<style>
<sub>
<summary>
<sup>
<svg>
<table>
<tbody>
<td>
<template>
<textarea>
<tfoot>
<th>
<thead>
<time>
<title>
<tr>
<track>
<tt>
<u>
<ul>
<var>
<video>
<wbr>
HTML Теги
<!—…—><!DOCTYPE><a><abbr><acronym><address><applet><area><article><aside><audio><b><base><basefont><bdi><bdo><big><blockquote><body><br><button><canvas><caption><center><cite><code><col><colgroup><data><datalist><dd><del><details><dfn><dialog><dir><div><dl><dt><em><embed><fieldset><figcaption><figure><font><footer><form><frame><frameset><h1> — <h6><head><header><hr><html><i><iframe><img><input><ins><kbd><label><legend><li><link><main><map><mark><meta><meter><nav><noframes><noscript><object><ol><optgroup><option><output><p><param><picture><pre><progress><q><rp><rt><ruby><s><samp><script><section><select><small><source><span><strike><strong><style><sub><summary><sup><svg><table><tbody><td><template><textarea><tfoot><th><thead><time><title><tr><track><tt><u><ul><var><video>
Атрибут alt
Атрибут предоставляет альтернативный текст для изображения, если пользователь по какой-либо причине не может его просмотреть: из-за медленного Интернет-соединения, ошибки в атрибуте src или если пользователь использует программу чтения с экрана (скринридер).
Значение атрибута должно описывать изображение, т.е. то, что на нём изображено:
Пример
<img src=»img_chania.jpg» alt=»Flowers in Chania»>
Если браузер не может найти изображение, он отображает значение атрибута :
Пример
<img src=»wrongname.gif» alt=»Flowers in Chania»>
Примечание: Атрибут обязателен. Без него веб-страница не будет считаться валидной.
HTML Справочник
HTML Теги по алфавитуHTML Теги по категорииHTML ПоддержкаHTML АтрибутыHTML ГлобальныеHTML СобытияHTML Названия цветаHTML ХолстHTML Аудио/ВидеоHTML ДекларацииHTML Набор кодировокHTML URL кодHTML Коды языкаHTML Коды странHTTP СообщенияHTTP методыКовертер PX в EMКлавишные комбинации
HTML Теги
<!—…—>
<!DOCTYPE>
<a>
<abbr>
<acronym>
<address>
<applet>
<area>
<article>
<aside>
<audio>
<b>
<base>
<basefont>
<bdi>
<bdo>
<big>
<blockquote>
<body>
<br>
<button>
<canvas>
<caption>
<center>
<cite>
<code>
<col>
<colgroup>
<data>
<datalist>
<dd>
<del>
<details>
<dfn>
<dialog>
<dir>
<div>
<dl>
<dt>
<em>
<embed>
<fieldset>
<figcaption>
<figure>
<font>
<footer>
<form>
<frame>
<frameset>
<h1> — <h6>
<head>
<header>
<hr>
<html>
<i>
<iframe>
<img>
<input>
<ins>
<kbd>
<label>
<legend>
<li>
<link>
<main>
<map>
<mark>
<meta>
<meter>
<nav>
<noframes>
<noscript>
<object>
<ol>
<optgroup>
<option>
<output>
<p>
<param>
<picture>
<pre>
<progress>
<q>
<rp>
<rt>
<ruby>
<s>
<samp>
<script>
<section>
<select>
<small>
<source>
<span>
<strike>
<strong>
<style>
<sub>
<summary>
<sup>
<svg>
<table>
<tbody>
<td>
<template>
<textarea>
<tfoot>
<th>
<thead>
<time>
<title>
<tr>
<track>
<tt>
<u>
<ul>
<var>
<video>
<wbr>
Адаптивная ширина изображения
Обычно не требуется задавать конкретную ширину изображения. Если указать фиксированную ширину, она может оказаться слишком маленькой для экранов устройств некоторых пользователей и слишком большой для других. Лучше всего поместить изображение внутрь адаптивного контейнера (определяемого в процентах), а затем задать для него заполнение по всей ширине:
#responsive-image {  width: 100%;  height: auto; }

<img src="https://www.internet-technologies.ru/wp-content/uploads/very-large-flamingo.jpg" id="responsive-image">
Если нужно предоставить для всех пользователей полностью адаптивный дизайн, примените атрибут srcset, чтобы указать дополнительные размеры изображения. Или элемент <picture>, чтобы задать альтернативный дизайн изображения.
Image Modal (Advanced)
This is an example to demonstrate how CSS and JavaScript can work together.
First, use CSS to create a modal window (dialog box), and hide it by
default.
Then, use a JavaScript to show the modal window and to display the
image inside the modal, when a user clicks on the image:

Example
// Get the modalvar modal = document.getElementById(‘myModal’);// Get the image and insert it
inside the modal — use its «alt» text as a captionvar img =
document.getElementById(‘myImg’);var modalImg = document.getElementById(«img01»);
var captionText = document.getElementById(«caption»);img.onclick =
function(){ modal.style.display = «block»; modalImg.src = this.src; captionText.innerHTML = this.alt;}
// Get the <span> element that closes the modalvar span =
document.getElementsByClassName(«close»);// When the user clicks
on <span> (x), close the modalspan.onclick = function() { modal.style.display = «none»;}
❮ Previous
Next ❯
Code Example
Using the tag
The element is the most straight-forward way of displaying a static image on a page. You should normally use it whenever an image is actually a part of the content (as opposed to using an image as part of a page’s design).
All tags must have a defined attribute. This defines the image to be displayed. Typically, the is a URL, but a data representation of the image can also be used in some cases.
Inline vs. Block
Intuitively, an image seems like a block element. It has a defined width and height, and cannot be broken over multiple lines. It behaves like a block.
Unfortunately, because of historical reasons, the HTML specification (and all browsers, by default) treat the tag as if it is an inline element. Because of the way browsers handle white space, this can cause problems if you are not careful.
This combination of text and image looks bad on most browsers.
There at least two easy ways to fix this. The simplest is to simply make sure there is a line break before and after your images. This is fine if you don’t care much about flowing text around your image.
This is some text that appears above the image.
Here is some other text below the image.
A better, more systematic way of handling the inline image problem is to images into block elements with CSS.
#block-img img { display: block; }
This is some text that appears above the image.
Here is some other text below the image.
Using the CSS rule is a good default way of presenting images, which you can then build upon for other types of presentation — such as wrapping text around an image within the flow of an article.
Responsive Images
It’s important to make sure that images display correctly across a wide variety of screen widths and window sizes. One of the easiest techniques for accomplishing this is to use CSS to set the (or the ) to . This will ensure that the image is never too big for its container. When used in conjunction with a flexible-grid system, this optimizes the images display size for various screen widths.
#responsive-width img { width: 100%; height: auto; }
There are two other techniques you should know for responsive images:
- Using the image attribute to specify multiple sizes of a single image.
- Using the element to specify different image designs for different contexts.
Deprecated attributes
The element has been a part of the HTML specification almost since the beginning, and has been a vital part of HTML-based page design since before the advent of modern browsers, CSS3, or semantic markup. Because of this history, there are a large number of deprecated (no longer in use) attributes that have previously been used with the element.
Many of the deprecated attributes are related to layout and positioning, other have to do with browser behavior. In most cases, CSS is the preferred method for achieving these layout effects. In other cases, JavaScript is the best way to get the desired results.
Deprecated attributes are marked below in red. Where possible, we have provided additional information on how to achieve the desired effects using modern standards.
For more information about deprecated tags and other changes to the HTML specification, see our article on HTML5.
Adam Wood
| All | All | All | All | All | All |
Атрибуты
| Атрибут | Значение | Описание |
|---|---|---|
| alt | text | Задает альтернативный текст для изображения |
| crossorigin | anonymous use-credentials |
Разрешить использование изображений со сторонних сайтов, разрешающих кросс-исходный доступ, с canvas |
| height | pixels | Задает высоту изображения |
| ismap | ismap | Задает изображение в качестве карты изображений на стороне сервера |
| longdesc | URL | Задает URL для подробного описания изображения |
| referrerpolicy | no-referrerno-referrer-when-downgradeorigin origin-when-cross-originunsafe-url |
Указывает, какие ссылки следует использовать при извлечении изображения |
| sizes | sizes | Задает размеры изображений для различных макетов страниц |
| src | URL | Указывает путь к изображению |
| srcset | URL | Указывает путь к изображению, который будет использоваться в различных ситуациях |
| usemap | #mapname | Задает изображение в качестве карты изображений на стороне клиента |
| width | pixels | Задает ширину изображения |
Responsive Image Gallery
CSS can be used to create image galleries. This example use
media queries to re-arrange the images on different screen sizes. Resize the
browser window to see the effect:
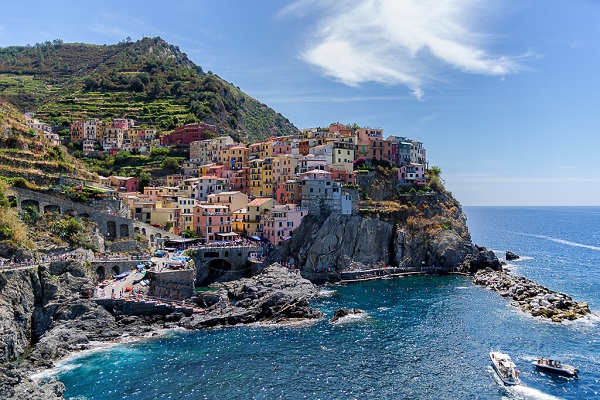
Add a description of the image here
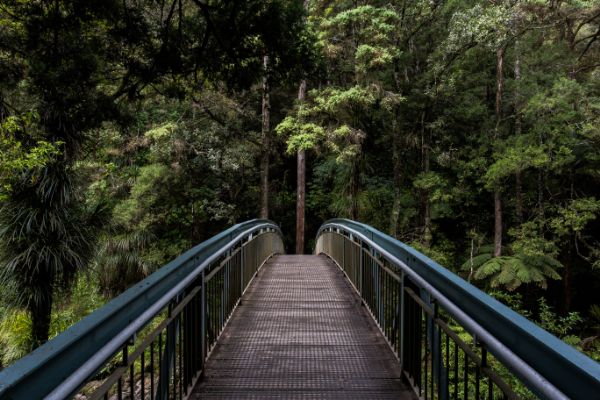
Add a description of the image here
Add a description of the image here

Add a description of the image here
Example
.responsive {
padding: 0 6px; float: left; width: 24.99999%;}@media only screen and
(max-width: 700px){ .responsive {
width: 49.99999%; margin: 6px
0; }}@media only screen and (max-width: 500px){ .responsive { width: 100%;
}}
Tip: Read more about Responsive Web Design in our
CSS RWD Tutorial.
HTML Reference
HTML by AlphabetHTML by CategoryHTML Browser SupportHTML AttributesHTML Global AttributesHTML EventsHTML ColorsHTML CanvasHTML Audio/VideoHTML Character SetsHTML DoctypesHTML URL EncodeHTML Language CodesHTML Country CodesHTTP MessagesHTTP MethodsPX to EM ConverterKeyboard Shortcuts
HTML Tags
<!—>
<!DOCTYPE>
<a>
<abbr>
<acronym>
<address>
<applet>
<area>
<article>
<aside>
<audio>
<b>
<base>
<basefont>
<bdi>
<bdo>
<big>
<blockquote>
<body>
<br>
<button>
<canvas>
<caption>
<center>
<cite>
<code>
<col>
<colgroup>
<data>
<datalist>
<dd>
<del>
<details>
<dfn>
<dialog>
<dir>
<div>
<dl>
<dt>
<em>
<embed>
<fieldset>
<figcaption>
<figure>
<font>
<footer>
<form>
<frame>
<frameset>
<h1> — <h6>
<head>
<header>
<hr>
<html>
<i>
<iframe>
<img>
<input>
<ins>
<kbd>
<label>
<legend>
<li>
<link>
<main>
<map>
<mark>
<meta>
<meter>
<nav>
<noframes>
<noscript>
<object>
<ol>
<optgroup>
<option>
<output>
<p>
<param>
<picture>
<pre>
<progress>
<q>
<rp>
<rt>
<ruby>
<s>
<samp>
<script>
<section>
<select>
<small>
<source>
<span>
<strike>
<strong>
<style>
<sub>
<summary>
<sup>
<svg>
<table>
<tbody>
<td>
<template>
<textarea>
<tfoot>
<th>
<thead>
<time>
<title>
<tr>
<track>
<tt>
<u>
<ul>
<var>
<video>
<wbr>
Как вставить изображение в HTML?
Для того чтобы вставить изображение на HTML-страницу, используется одиночный простой тег:
<img src=”xxx”>,
где xxx — адрес изображения. В том случае, если картинка находится в одной директории со страницей, тег будет выглядеть как:
<img src=”image.png”>
Однако скоростной и стабильный интернет добрался ещё не во все уголки земного шара, и бывает так, что изображение на веб-сайте попросту не загружается. Для таких случаев существует понятие альтернативного текста.
Он показывается на месте картинки в момент его недоступности, загрузки или в режиме работы браузера «без картинок». Добавляется он с помощью атрибута alt тега <img>.
Пример добавления альтернативного текста к графическому файлу:
<!DOCTYPE html>
<html>
<head>
<meta charset="utf-8">
<title>Альтернативный текст</title>
</head>
<body>
<p><img src="images/example.png" alt="Альтернативный текст"></p>
</body>
</html>
Назначение размеров картинки в HTML
Для того чтобы изменить размеры отображения графического файла, используют теги height и width, где height — высота, а width — ширина, измеряемые в пикселях.
При использовании данных атрибутов браузер сначала выделяет место для графического контента, подготавливает общий макет страницы, отображает текст, после чего загружает саму картинку.
Рисунок помещается в прямоугольник с заданными размерами, а в том случае, если параметры меньше или больше исходных, картинка растягивается или сжимается.
Если атрибуты height и width не используются, браузер загружает изображение сразу, задерживая отображение текста и прочих элементов страницы.
Данные параметры можно указать как в пикселях (размер картинки постоянен и не зависит от разрешения экрана пользователя), так и в процентах (размер картинки зависит от разрешения экрана).
Например:
<img src=”example.png” width=”60” height=”40”>
или
<img src=”example.png” width=”50%” height=”10%”>
Следует помнить, что в тот момент, когда вы изменяете исходный размер изображения, необходимо сохранять его пропорции.
Для этого достаточно указать значение только одного из параметров (ширины или высоты), а значение второго браузер вычислит в автоматическом режиме.
Расположение картинки в HTML
Как и ко многим тегам HTML, к применим атрибут align, который выполняет выравнивание изображения:
<img src=”example.png” align=”top”> — картинка располагается выше текста;
<img src=”example.png” align=”bottom”> — картинка располагается ниже текста;
<img src=”example.png” align=”left”> — картинка располагается слева от текста;
<img src=”example.png” align=”right”> — картинка располагается справа от текста.
Картинка-ссылка
В HTML для создания ссылки используется тег <a>:
<a href=”адрес вашей ссылки”>Имя ссылки</a>
Для того чтобы задать графическую ссылку, необходимо всего лишь объединить тег изображения с тегом ссылки.
Делается это следующим образом:
<a href=”адрес ссылки”><img src=”адрес картинки”></a>
Как видите, графическая вставка может быть ссылкой и при клике переадресовывать на любой адрес, записанный в полном или сокращённом варианте.
Как можно сделать картинку фоном в HTML?
Изображение можно не только вставлять на страницу в качестве видимого объекта, но и сделать фоновым. Для определения картинки как фона необходимо в теге прописать атрибут background=”xxx”, где xxx — адрес картинки, указанный таким же способом, как в примерах выше.
Для примера зададим такую текстурную картинку в роли фоновой:
Сохраните изображение в папке с заготовленной заранее страницей и пропишите следующие строки:
<html>
<head><title>Страница с фоновой картинкой</head></title>
<body background=”image.jpg”>
<h1> Фон с текстом. </h1>
</body>
</html>
Фоновая картинка на странице задана.
На этом информация о тегах и атрибутах, необходимых для вставки изображения на HTML страницу сайта, исчерпана.
Желаем удачи!
Definition and Usage
The tag is used to embed an image in an HTML page.
Images are not technically inserted into a web page; images
are linked to web pages. The tag creates a holding space for the referenced image.
The tag has two required attributes:
- src — Specifies the path to the image
- alt — Specifies an alternate text for the image, if the image for some
reason cannot be displayed
Note: Also, always specify the width and height of an image.
If width and height are not specified, the page might flicker while the image
loads.
Tip: To link an image to another document, simply nest the tag inside
an <a> tag (see example below).
Как вставить картинку в HTML
В HTML изображения в графическом формате (GIF, JPEG, PNG, APNG, SVG, BMP, ICO) добавляются на веб-страницу с помощью тега <img> через атрибут src, в котором указывается адрес картинки. То есть атрибут src является обязательным для элемента <img>. Без него этот тег не используют.
Ещё одним обязательным атрибутом элемента <img> является alt. Этот атрибут используют на тот случай, если по какой-либо причине, браузер не сможет отобразить картинку. При его использовании, в месте отображения картинки на экран будет выведен указанный вами текст.
В таблице ниже представлены атрибуты тега <img>, которые используются наиболее часто. Но на самом деле их намного больше, ведь для элемента <img> доступны все универсальные атрибуты и события.
Таблица. Основные атрибуты элемента <img>
| Атрибут | Описание | Пример |
| alt | Добавляет альтернативный текст для изображения. Этот текст выводится в месте появления изображения до его загрузки, или если картинка не может быть загружена (Например, при отключенной графике, или указан неверный путь к изображению). | <img src=»/D-Nik-Webmaster.jpg» alt=»Здесь должна быть картинка»> |
| height | Высота изображения в пикселях (px). Если задать высоту изображения и при этом не указывать ширину, то картинка будет сжата пропорционально. | <img src=»/D-Nik-Webmaster.jpg» height=»300″> |
| src | Задает путь к изображению. | <img src=»/D-Nik-Webmaster.jpg»> |
| sizes | Задаёт размер изображения в зависимости от параметров отображения (размеры изображения для разных макетов страницы).Работает только при заданном атрибуте srcset.Значением атрибута является одна или несколько строк, указанных через запятую.В качестве значений можно использовать единицы em, ex, ch, rem, vw, vh, vmin, vmax, cm, mm, q, in, pc, pt, px, но не проценты. | sizes=» (max-width: 20em) 30vw, (max-width: 30em) 60vw, (max-width: 40em) 90vw»Здесь vw — это ширина в процентах от области просмотра. |
| srcset | Создаёт список источников для изображения, которые будут выбраны, исходя из разрешения экрана. Может использоваться вместе с атрибутом src, или вместо него. Значением этого атрибута является одна или несколько строк, разделенных запятой. |
srcset=» img/logo-mobile.jpg 320w, img/logo-wide-mobile.jpg 480w, img/logo-tablet.jpg 768w, img/logo-desktop.jpg 1024w, img/logo-hires.jpg 1280w» Здесь w — дескриптор ширины, который представляет собой целое положительное число, за которым следует w. |
| width | Ширина изображения. Если задать ширину изображения и при этом не указывать высоту, то картинка будет сжата пропорционально. | <img src=»/D-Nik-Webmaster.jpg» width=»300″> |
Code Example
The text
The attribute will accept any text string, but there are certain best practices that will help.
- No special characters. This includes UTF-8 characters such as unencoded curly quotes, as well as HTML Character Entities.
- No HTML.
- No more than 125 characters.
- Just identify the picture. No need to refer to it (“This is a picture of…”).
The description — Users
The attribute provides an “alternative description” for the image. This description is normally not presented to the user, but will be under certain circumstances:
- Assistive technology — If the user is visually impaired, and is using a screen reader, the screen reader will read the description to the user.
- Images turned off — Some users prefer to surf the web with images turned off (to save bandwidth or to minimize distraction). These users will normally see the description instead of the image.
- Image failure — If an image fails to load for any reason (bad file name, connection problems), the user will usually see the description in place of the image.
Here’s an example of displaying the text in place of a failed image (the image points to nothing).
The description — Search Engines
The description is also very helpful for search engines. Search engines have a hard time figuring out what the content of an image actually is. They are getting better at it, but identifying the subject of a photo or picture is extremely difficult. So search engines rely on the description to know what is actually in a picture (they also use the file name and other attributes). Additionally, in Google Image Search, the description is actually shown to the user.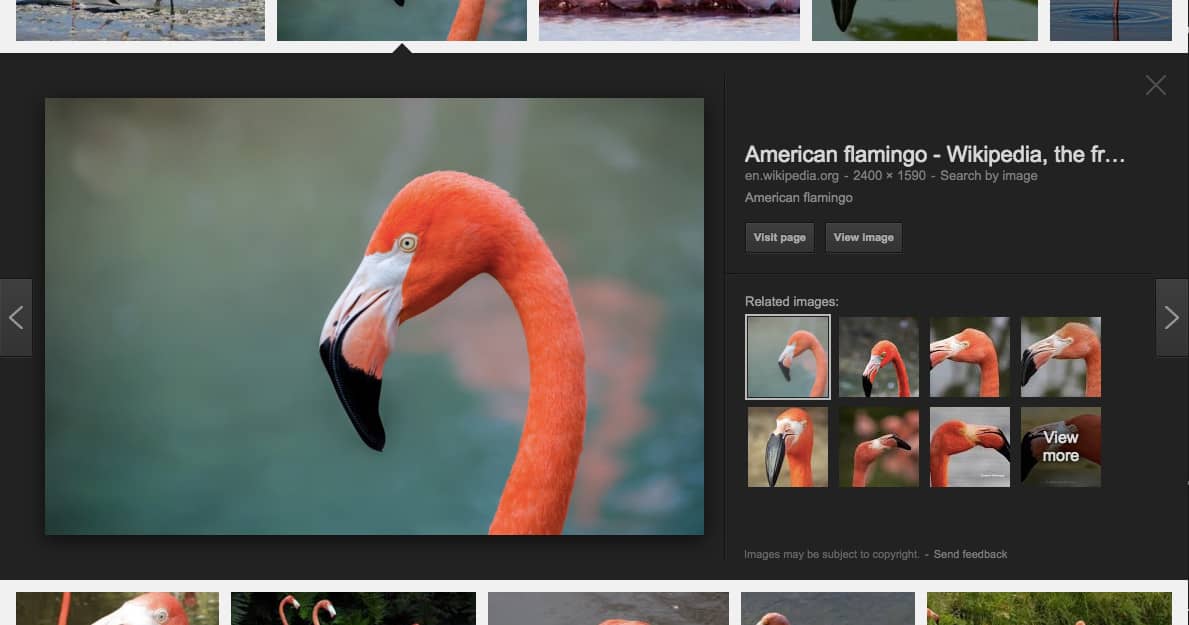
“American flamingo” is the alt text of flamingo picture. If you care about SEO, you should make sure that you have relevant descriptions for all of your images.
Values of the Attribute
All Attributes of Element
| Attribute name | Values | Notes |
|---|---|---|
| height | Identifies the intrinsic height of an image file, in CSS pixels. | |
| srcset | list of sources | Defines multiple sizes of the same image, allowing the browser to select the appropriate image source. |
| align | right left | Was previously used to specify the alignment and placement of an image relative to the surrounding text. It has been deprecated and should not be used. |
| alt | text | Defines alternate text, which may be presented in place of the image. |
| border | pixels | Previously used to define a border on an image element. It has been deprecated and should no longer be used. |
| controls | Toggled media player controls when used in conjunction with the <code>dynsrc</code> attribute. Both attributes are now deprecated. | |
| dynsrc | ||
| hspace | Previously used to add horizontal space on both side of an image. It is now deprecated. | |
| ismap | Identifies an image as a server-side image map. When the containing anchor link is clicked, the coordinates of the mouse will be included in the request. | |
| longdesc | Defines a URL at which can be found more information about the image. It was written out of the HTML5 specification, but its status is not quite so clear as other deprecated features. | |
| loop | Previously used to specify the number of times a video should play, when used in conjunction with the dynsource attribute. Both attributes have been deprecated. | |
| lowsrc | Specified a smaller or lower-quality version of an image. | |
| name | Identified the image or provided additional information about it. Deprecated in HTML 4.0 in favor of other attributes. | |
| naturalsizeflag | This attribute does nothing. It was once used by a proprietary software system. | |
| nosave | Was intended to prevent users from downloading an image. Was never a part of the HTML specification, and not widely implemented. | |
| start | fileopen mouseover | |
| suppress | Used by the now-defunct Netscape browser to suppress the display of image prior to image download completion. | |
| usemap | Specifies a client-side image map to be used with the image. | |
| width | Indicates the intrinsic width of the image, in CSS pixels. | |
| src | Specifies the URL of an image to be displayed. |
Adam Wood
Вписывание картинки в область
Порой изображения необходимо вписать в область заданных размеров, например, для создания слайдшоу — плавной смены нескольких фотографий. Есть два основных способа. Первый метод простой и работает во всех браузерах. Задаём желаемые размеры области и скрываем всё, что в неё не помещается с помощью свойства overflow со значением hidden (пример 5).
Пример 5. Использование overflow
<!DOCTYPE html>
<html>
<head>
<meta charset=»utf-8″>
<title>Изображения</title>
<style>
figure {
width: 100%; /* Ширина области */
height: 400px; /* Высота области */
margin: 0; /* Обнуляем отступы */
overflow: hidden; /* Прячем всё за пределами */
min-width: 600px; /* Минимальная ширина */
}
figure img {
width: 100%; /* Ширина изображений */
margin: -10% 0 0 0; /* Сдвигаем вверх */
}
</style>
</head>
<body>
<figure>
<img src=»image/redcat.jpg» alt=»Рыжая кошка»>
</figure>
</body>
</html>
Результат примера показан на рис. 4. Область имеет высоту 400 пикселей и занимает всю доступную ей ширину. Для фотографии внутри <figure> устанавливаем ширину 100% и сдвигаем её чуть вверх, чтобы она лучше выглядела. Поскольку высота области фиксирована, то при уменьшении окна браузера до некоторого предела высота фотографии окажется меньше 400 пикселей и под ней появится пустое пространство. Поэтому вводим свойство min-width чтобы этого избежать.

Рис. 4. Фотография внутри области заданных размеров
Второй способ не так универсален, поскольку свойство object-fit не поддерживается в IE, а Firefox его понимает только с версии 36. Зато object-fit позволяет более аккуратно вписать изображение в заданную область. В примере 6 показан стиль для этого. Задействовано значение cover, оно увеличивает или уменьшает изображение так, чтобы оно всегда полностью заполняла всю область.
Пример 6. Использование object-fit