Как вставить видео и аудио на веб-страницу
Содержание:
- Подход на чистом CSS
- Part 1: Top 6 HTML5 video player
- Дополнительные атрибуты
- Как добавить видео на сайт со своего ПК
- Use the tag for inserting videos in HTML
- HTML5 тег —
- Cases and Examples
- What is Video Streaming and How Does it Work?
- HTML5
- Примеры элементов
- What is an HTML5 Video Player?
- HTML5 Video Support
- Описание
- A Note on Players
Подход на чистом CSS
Создайте HTML5-видео:
<video playsinline autoplay muted loop poster="polina.jpg" id="bgvid">
    <source src="polina.webm" type="video/webm">
    <source src="polina.mp4" type="video/mp4">
</video>
Важно: порядок видеофайлов имеет значение. В браузере Google Chrome есть ошибка, из-за которой он не может автоматически воспроизводить видео в формате .webm, если оно идет после чего-либо еще
Изображение постера будет заменено первым кадром видео после загрузки. Поэтому имеет смысл извлечь его из ролика.
Приведенный ниже код позволяет сделать видео полноэкранным:
video#bgvid {
    position: fixed;
    top: 50%;
    left: 50%;
    min-width: 100%;
    min-height: 100%;
    width: auto;
    height: auto;
    z-index: -100;
    -ms-transform: translateX(-50%) translateY(-50%);
    -moz-transform: translateX(-50%) translateY(-50%);
    -webkit-transform: translateX(-50%) translateY(-50%);
    transform: translateX(-50%) translateY(-50%);
    background: url(polina.jpg) no-repeat;
    background-size: cover;
}
Устаревшие версии браузеров не распознают видео форматы, но узнают тег <video>. Специально для этих браузеров мы создаем элемент background-image, используя ту же картинку-заполнитель.
На данном этапе только браузер Safari (мобильный и настольный) требует webkit-префикса поставщика для преобразований, поэтому он был включен в код.
Part 1: Top 6 HTML5 video player
No.1 HTML5 Video Player — JW player
(https://www.jwplayer.com/video-solutions/html5-video-player/)
JW Player is consistently able to offer the best viewing experience. The JW HTML5 Video Player performs greatly with the most popular desktop-based or mobile browsers to let users use and watch HTML5 videos or other videos with any buffering delays. Whatever browser you have on Windows, Android or iOS, JW Player will provide you great experience to access your HTML5 video perfectly.

No.2 HTML5 Video Player — YouTube HTML5 Video Player
(https://www.youtube.com/html5)
In case if you often run out of space over server then it is advised to move to YouTube hosting environment. YouTube has recently switched to HTML5 based default video player tool and now you need not to worry about video encoding process every time. You can request that the HTML5 video player be used if your browser doesn’t use it by default.

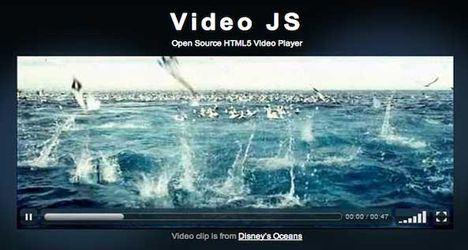
No.3 HTML5 Video Player — Videojs
(http://videojs.com/)
Videojs is another web video player tool for video lovers that is designed with HTML5. This HTML5 video player follows protocols of Flash video along with HTML5. The advanced plugins also supports playback on many social media platforms including Vimeo, YouTube. It is easy to set up, and you can enjoy video playback with Videojs on mobile devices and desktops.
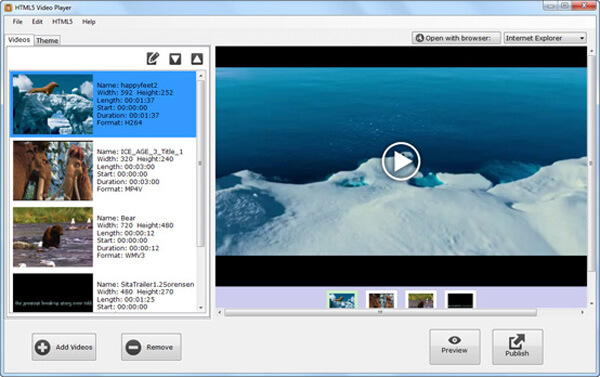
No.4 HTML5 Video Player — HTML5 Video Player
(http://www.html5videoplayer.net/)
HTML5 Video Player software support HTML5 video on all well-known web browsers, such as Safari IE9, Chrome, Opera, Firefox and so on. No or tags is needed. The program can also convert almost all video formats and encode them to HTML5 video formats, WebM, MP4, OGG/OGV. It also offers some basic video editor features.
No.5 HTML5 Video Player — JPlayer
(http://jplayer.org/)
JPlayer is a completely free and open source HTML5 video player written in JavaScript. As a jQuery plugin, JPlayer allows you to quickly weave cross platform audio and video into your web pages. This HTML5 video player is very lightweight and totally customizable with HTML and CSS.
No.6 HTML5 Video Player — Bitmovin HTML5 Player
(https://bitmovin.com/html5-player/)
With great technology, Bitmovin HTML5 Player is able to completely customizable to your needs. This HTML5 video player needs no any client side plugs-in. The Bitmovin player streams high quality, encoded video files without any delay. It offers encoding service and HTML5 player working together. With this program, you can play Virtual reality and 360 degree video on any device. Its patented adaptive technology ensures maximum quality.

If you’re keen on using HTML5 videos on your website, you should know something about the file types of responding browser.
◆ Google Chrome – WebM, OGG
◆ Mozilla Firefox – WebM, OGG
◆ Safari – MP4
◆ Opera – WebM, OGG
◆ Internet Explorer 9 – MP4
◆ Internet Explorer 6-8 – No HTML5 support
Дополнительные атрибуты
| Атрибут | Значение | Описание |
|---|---|---|
| autoplay | autoplay | Указывает, что воспроизведение видео начнется сразу после его готовности |
| controls | controls | Указывает, что элементы управления видео должны отображаться (например, кнопка воспроизведения/паузы и т.д.). |
| height | pixels | Устанавливает высоту видео проигрывателя |
| loop | loop | Указывает, что видео будет начинаться снова, каждый раз, когда он закончится |
| muted | muted | Указывает, что аудиовыход видео должен быть отключен |
| poster | URL | Указывает изображение, которое будет отображаться во время загрузки видео, или до тех пор, пока пользователь не достигнет кнопки воспроизведения |
| preload | auto metadata none |
Указывает, если и как автор считает, что видео должно быть загружено при загрузке страницы |
| src | URL | Указывает URL-адрес видео-файла |
| width | pixels | Устанавливает ширину видео проигрывателя |
Как добавить видео на сайт со своего ПК
Чтобы быстро разместить видео на сайте без Ютуба и других хостингов, воспользуйтесь программой ВидеоМАСТЕР. Софт позволит справиться с задачей, выполнив три простых действия. Скачайте видео конвертер и следуйте инструкции.
Шаг №1. Добавьте файл в программу
Нажмите кнопку «Добавить», и программа предложит несколько способов импортировать материал. Можете загрузить файл с ПК, записать видео на веб-камеру, скачать видеоролик с YouTube или из VK, использовать видеодорожку с DVD-диска
Важно, что софт позволяет не ограничиваться одним роликом – добавляйте в список конвертирования столько дорожек, сколько хотите разместить на сайте
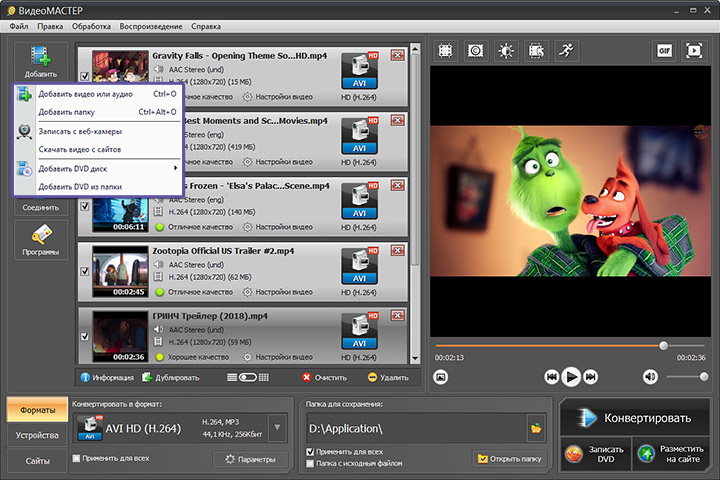
Добавьте видео в список конвертирования
Шаг №2. Настройте параметры видео
Кликните по кнопке «Разместить на сайте». В появившемся окне выберите подходящий вам скин для плеера. Если вы хотите сделать контейнер с видео меньше/больше стандартного 640х390, отдайте предпочтение интерфейсу с пометкой «Поддерживает изменение размера».

Выберите плеер для сайта
Определите формат, размер кадра, битрейт, пропорции плеера. Назначьте папку для сохранения материалов. ВидеоМАСТЕР отправит туда финальный ролик (или несколько) вместе с необходимыми материалами.
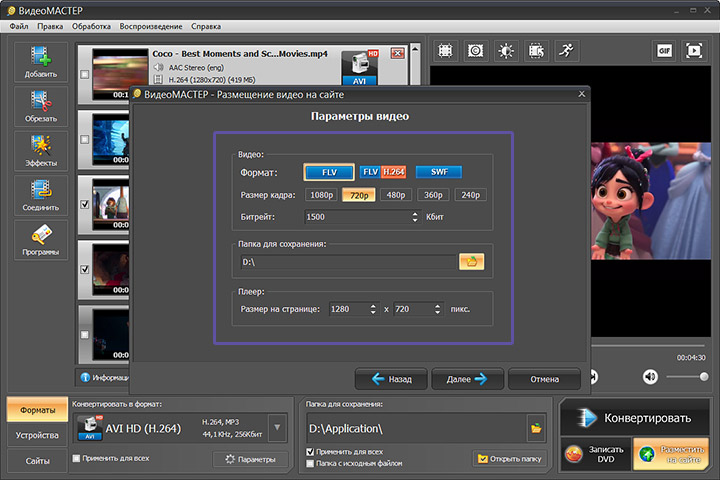
Настройте параметры видео
Шаг №3. Разместите видео на странице
Нажмите «Далее» и дождитесь, пока программа завершит подготовку видео. Если вы работали с одним файлом, ВидеоМАСТЕР моментально сгенерирует код, который нужно скопировать и вставить в вёрстку web-страницы.
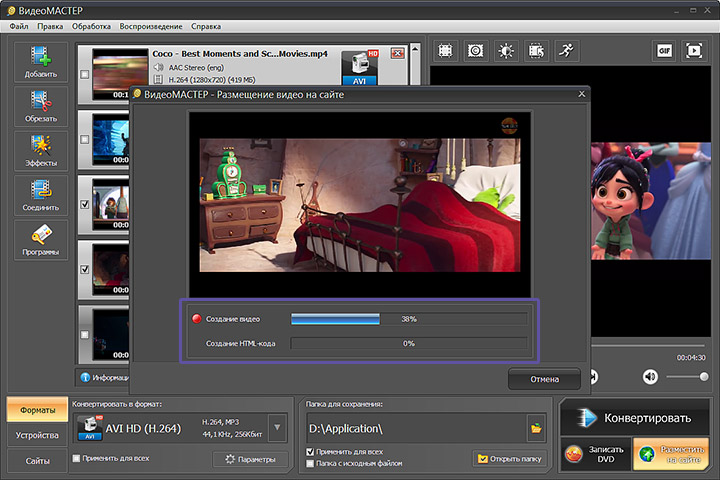
Дождитесь, пока программа сгенерирует html-код
Если роликов несколько, перейдите в папку, которую указывали ранее. Для каждого видео материалы будут собраны отдельно. В подпапках вы найдёте видеодорожку, файл txt, файл с плеером, html-страницу «Код для вставки видео». Всё это необходимо загрузить на сервер. После – открыть код, скопировать и вставить в нужное место в вёрстке уже вашей web-страницы.
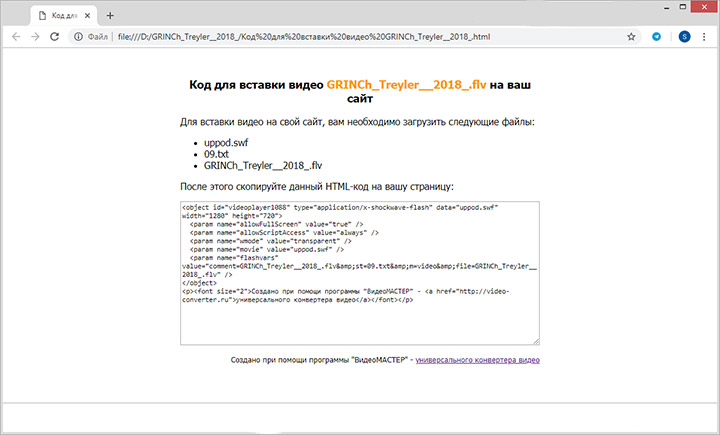
Скопируйте код и вставьте в вёрстку вашей страницы
Use the tag for inserting videos in HTML
The <video> tag is added in HTML5 along with its sibling, <audio>. Before the release of HTML5, a video could only be played in a browser with a plug-in (like a flash). The HTML5 <video> element specifies a standard way to embed a video in a web page. That is to say that the video is identified by adding a video URL to a source attribute. One can use it to embed videos imported from the computer or hosted by an external website.
For the basic use, all we need to do in an HTML document is to add the video URL to the element by using the <source> element to identify the video URL and to add the controls attribute so that website visitors can control video options. It is also important to use the width and height attributes to set the size of the video. Let’s see a simple example.
Result
Your browser doesn’t support HTML5 video.
At a minimum, to use the <video> element, the following attributes need to be used:
- src, which defines the URL where the video content is hosted,
- type, which defines the format of the file,
- controls, which must be specified or no visual element will appear to control playback of the content.
Moreover, there are several optional attributes which can be used to influence the way video content is loaded. These attributes include:
- autoplay, which specifies that the video will start playing as soon as it is ready,
- loop, which specifies that the video will start over again every time it is finished,
- poster, which selects an image to display as the poster for the video until playback begins,
- preload, which tells how the author thinks the video should be loaded when the page loads.
Another critical point to remember is that all modern browsers support the <video> element.
Currently, the HTML5 <video> tag supports 3 types of video files:
| Format | MIME-type |
|---|---|
| MP4 | video/mp4 |
| WebM | video/webm |
| Ogg | video/ogg |
HTML5 тег —
В HTML5 для вставки видеоматериалов в документ удобно использовать тег <video>.
<video width=»320″ height=»240″ controls>
<source src=»movie.mp4″ type=»video/mp4″>
<source src=»movie.ogg» type=»video/ogg»>
Your browser does not support the video tag.
</video>
Сейчас HTML5 <video> tag, поддеоживает 3 типа видеофайлов:
- mp4 — MIME-type video/mp4
- webm — MIME-type video/webm
- ogg — MIME-type video/ogg
Атрибуты тега video
- autoplay — если присутствует, то видео начинает проигрываться сразу же после загрузки страницы.
- autobuffer — если присутствует, то видео начнет загружаться с сервера, однако не начнет проигрываться до тех пор, пока пользователь не нажмет на кнопку play.
- poster — указывает путь к изображению, которое показывается, когда видеофайл отсутствует или еще не запущен.
- controls — Отображение встроенных элементов управления мультимедийным файлом (кнопка воспроизведения/паузы, регулятор, позволяющий перейти к определенному фрагменту ролика, а также регулятор уровня громкости).
- width — ширина области просмотра
- height — высота области просмотра.
Поддержка браузеров. Кодеки.
Форматы аудио и видео для файлов, используемых в теге <video>
Браузеры компьютеров
| Свойство | Chrome | Firefox (Gecko) | Internet Explorer | Opera | Safari |
|---|---|---|---|---|---|
| Basic support | 3.0 | 3.5 (1.9.1) | 9.0 | 10.50 | 3.1 |
| <audio>: PCM in WAVE | (Yes) | 3.5 (1.9.1) | No support | 10.50 | 3.1 |
| <audio>: Vorbis in WebM | (Yes) | 4.0 (2.0) | No support | 10.60 | 3.1 |
| <audio>: Streaming Vorbis/Opus in WebM via MSE | ? | 36.0 (36.0) | ? | ? | ? |
| <audio>: Vorbis in Ogg | (Yes) | 3.5 (1.9.1) | No support | 10.50 | No support |
| <audio>: MP3 | (Yes) | (Yes) | 9.0 | (Yes) | 3.1 |
| <audio>: MP3 in MP4 | ? | ? | ? | ? | (Yes) |
| <audio>: AAC in MP4 | (Yes) | (Yes) | 9.0 | (Yes) | 3.1 |
| <audio>: Opus in Ogg | 27.0 | 15.0 (15.0) | ? | ? | ? |
| <audio>: FLAC | No support | (51) | No support | No support | No support |
| <audio>: FLAC in Ogg | No support | (51) | No support | No support | No support |
| <video>: VP8 and Vorbis in WebM | 6.0 | 4.0 (2.0) | 9.0 | 10.60 | 3.1 |
| <video>: VP9 and Opus in WebM | 29.0 | 28.0 (28.0) | ? | (Yes) | ? |
| <video>: Streaming WebM via MSE | ? | 42.0 (42.0) | ? | ? | ? |
| <video>: Theora and Vorbis in Ogg | (Yes) | 3.5 (1.9.1) | No support | 10.50 | No support |
| <video>: H.264 and MP3 in MP4 | (Yes) | (Yes) | 9.0 | (Yes) | (Yes) |
| <video>: H.264 and AAC in MP4 | (Yes) | (Yes) | 9.0 | (Yes) | 3.1 |
| <video>: FLAC in MP4 | ? | (51) | ? | ? | ? |
Браузеры мобильных устройств
| Свойство | Android | Firefox Mobile (Gecko) | Firefox OS (Gecko) | IE Mobile | Opera Mobile | Opera Mini | Safari Mobile | Chrome for Android |
|---|---|---|---|---|---|---|---|---|
| Basic support | 2.3 | 24.0 | 1.0.1 | 10.0 | 11.0 | (Yes) | 3.2 | 29.0 |
| <audio>: PCM in WAVE | ? | 24.0 | 1.0.1 | No support | No support | (Yes) | 3.2 | ? |
| <audio>: Vorbis in WebM | ? | 24.0 | 1.0.1 | No support | 11.0 | (Yes) | No support | ? |
| <audio>: Streaming Vorbis in WebM via MSE | ? | ? | ? | ? | ? | ? | ? | ? |
| <audio>: Vorbis in Ogg | ? | 24.0 | 1.0.1 | No support | 11.0 | (Yes) | No support | ? |
| <audio>: MP3 | ? | (Yes) | (Yes) | 10.0 | ? | (Yes) | 3.2 | ? |
| <audio>: MP3 in MP4 | ? | ? | ? | ? | ? | ? | (Yes) | ? |
| <audio>: AAC in MP4 | ? | (Yes) | (Yes) | 10.0 | ? | (Yes) | (Yes) | ? |
| <audio>: Opus in Ogg | No support | 24.0 | No support | No support | No support | (Yes) | No support | No support |
| <video>: VP8 and Vorbis in WebM | 2.3 | 24.0 | 1.0.1 | No support | 16.0 | (Yes) | No support | 29.0 |
| <video>: VP9 and Opus in WebM | ? | ? | ? | ? | ? | ? | ? | ? |
| <video>: Streaming WebM via MSE | ? | 42.0 (42.0) | ? | ? | ? | ? | ? | ? |
| <video>: Theora and Vorbis in Ogg | No support | 24.0 | 1.0.1 | No support | No support | (Yes) | No support | No support |
| <video>: H.264 and MP3 in MP4 | (Yes) | 24.0 | (Yes) | 10.0 | 16.0 | (Yes) | (Yes) | 29.0 |
| <video>: H.264 and AAC in MP4 | (Yes) | 24.0 | (Yes) | 10.0 | 16.0 | (Yes) | 3.2 | 29.0 |
| <video>: FLAC in MP4 | ? | 51.0 (51) | ? | ? | ? | ? | ? | ? |
Cases and Examples
2.1 Include Various Formats
There are three video formats that work natively in some browsers. Unfortunately, no format works in all browsers, so you need to do at least two if you want meaningful HTML5 video support.
<!-- HTML SECTION  -->
<video controls>
  <source src="videos/minions.mp4" type="video/mp4">
  <source src="videos/minions.webm" type="video/webm">
  <source src="videos/minions.ogg" type="video/ogg">
</video>
Notice we used the tag to add videos of different formats, and not inside the video tag as an attribute.
Minimally, you must use MP4 + H.264, with AAC or MP3. MP4 video plays natively in Safari, Chrome, and IE9 (Vista/Windows 7). It is also your best option for a Flash video fallback, and plays natively on many devices (iOS, Android, Blackberry, PSP, Xbox, PS3, etc.). Use H.264 High Profile for the best quality, or Baseline profile if you want the same video to be playable on mobile devices.
Beyond that, use either WebM + VP8 or Ogg + Theora with Vorbis audio for other browsers. WebM works in Firefox (4+), Chrome (6+ or Chromium), and Opera (10.60+), and Ogg works in Firefox (3.5+), Chrome (3+), and Opera (10.54+).
The result in the browser woulld be just the same video but compatible (able to be read) by all browsers.
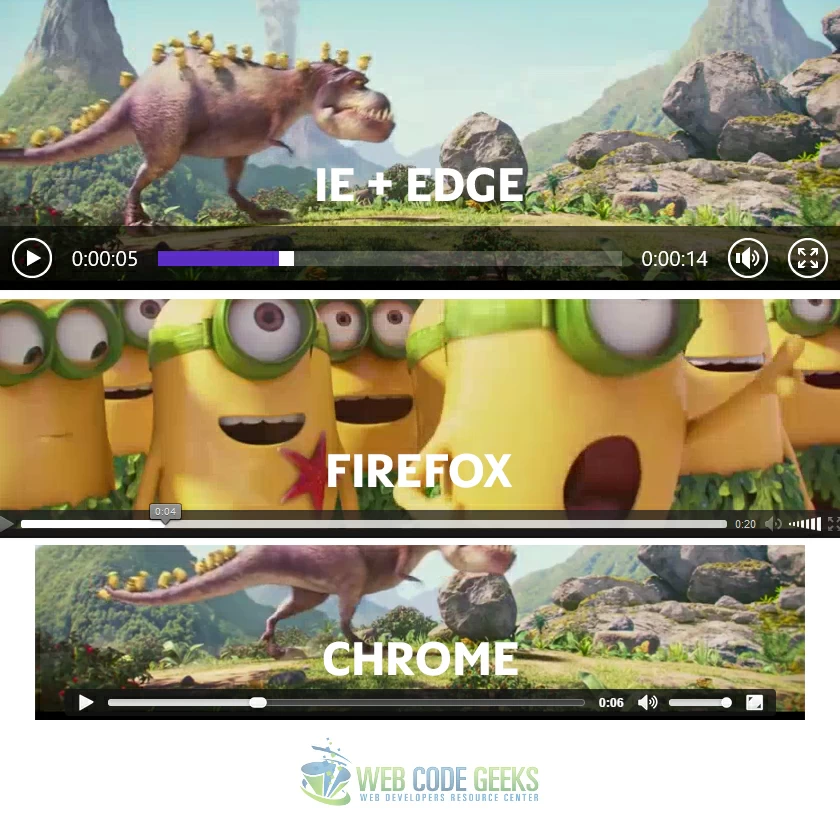
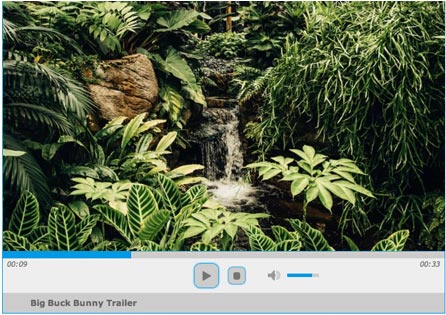
Browser’s interface for HTML5 Video
2.2 Custom Video Size
Attributes (most of which we mentioned and explained in the first section) are very useful when considering a customized video element that fits your needs inside the page. So in this section, we’ll have a look at how we can use the various attributes offered for the video element to enhance our content.
<!-- HTML SECTION  -->
<!-- added a custom width and height for the video size and also autoplay -->
<video width="640px" height="320px" autoplay controls>
  <source src="videos/minions.mp4" type="video/mp4">
  <source src="videos/minions.webm" type="video/webm">
  <source src="videos/minions.ogg" type="video/ogg">
</video>
The result would be a scaled video size that would automatically play as soon as the webpage is opened.
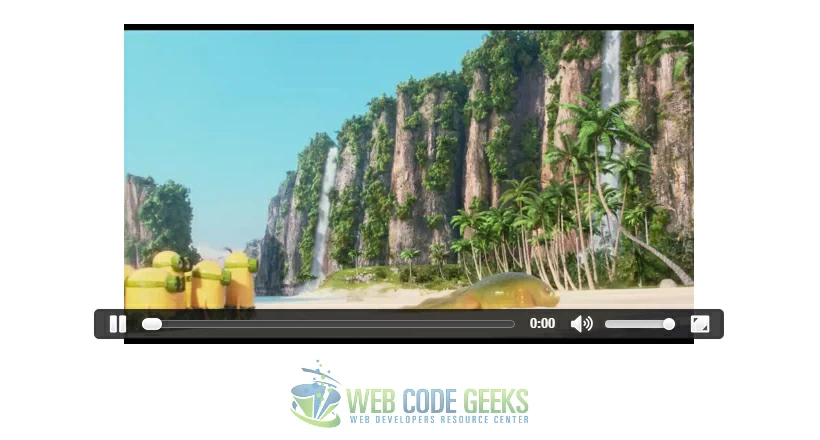
Autoplay is ON and the video is in a custom size!
2.3 Using a Custom Poster for the Video
Attributes also provide us a very cool feature called the . It gives the video an inital default image to display before being played.
<!-- HTML SECTION  -->
<!-- added a 'poster' attribute and specified the location of the poster image -->
<video width="856px" height="480px" poster="image.jpg" controls>
  <source src="videos/minions.mp4" type="video/mp4">
  <source src="videos/minions.webm" type="video/webm">
  <source src="videos/minions.ogg" type="video/ogg">
</video>
The result would be a poster image overlaying our video.
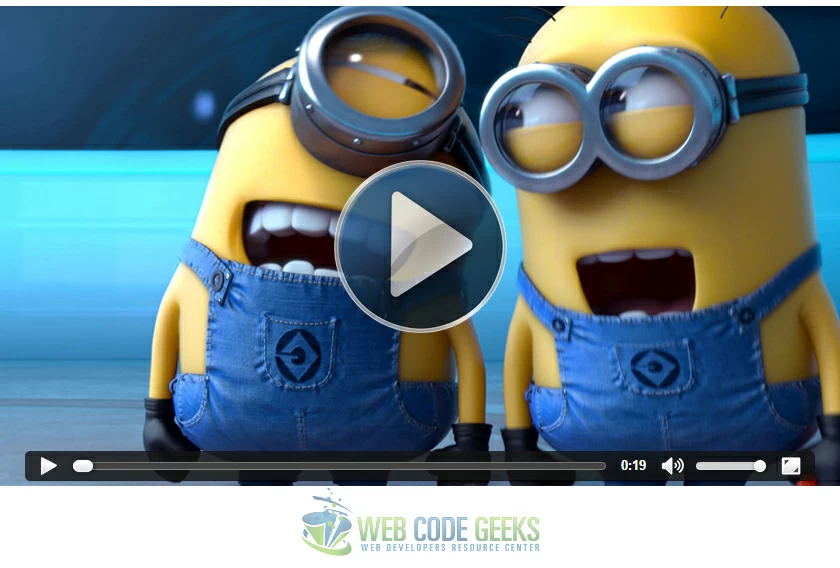
Poster Image over a HTML5 Video
2.4 Fullscreen HTML5 Video
When talking about fullscreen video of HTML5, it all comes down to CSS (unless you want to use javascript). You can actually override any attributes regarding the size of the video and force a video to display fullscreen like this:
<!-- HTML SECTION  -->
<video width="856px" height="480px" autoplay>
  <source src="videos/minions.mp4" type="video/mp4">
  <source src="videos/minions.webm" type="video/webm">
  <source src="videos/minions.ogg" type="video/ogg">
</video>
Applying this CSS snippet will make it possible:
<!-- STYLE  SECTION -->
<style type="text/css">
video {
    position: fixed;
    top: 50%;
    left: 50%;
    min-width: 100%;
    min-height: 100%;
    width: auto;
    height: auto;
    z-index: -100;
    -webkit-transform: translateX(-50%) translateY(-50%);
    transform: translateX(-50%) translateY(-50%);
}
</style>
Fullscreen HTML5 Video
What is Video Streaming and How Does it Work?
 Video streaming allows users to watch videos over the internet.
Since the 1990s, it’s been possible to access video media content from our internet browsers.
As a refresher, streaming a video is playing the video online. This process is unique in the sense that viewers can begin watching the video before it is completely downloaded, and the rest of the file downloads in real-time.
This process affords the viewer a steady stream of content, without making them wait for the entire file to download locally before viewing.
Over the years, the software technology behind this process has evolved to make the experience better for users. This has helped to better the video quality, reduce buffering, and improve the overall functionality of the video player.
That said, there are three methods for online video streaming. Let’s check them out.
1. Using a Proprietary Format
The first method for video streaming is using a proprietary format streamed from a particular website that is exclusive to that site.
This method refers to files like .mov, .rm, or .wmv. When broadcasters first presented videos via the internet, most browsers did not have built-in video players. In most cases, websites could choose the video format with which to work.
From there, they would just provide the player and the video on the web page itself. However, some formats required a dedicated player (such as Apple QuickTime for .mov formats). Even videos that worked without a dedicated player were not easy to share in those early streaming days.
This method is pretty much obsolete, but it is important to mention it since it is part of live streaming history.
2. Using an Intermediate Player
Another method for online streaming is using an intermediate player. YouTube is a perfect example.
YouTube was first launched in 2005, and over the following decade, the company has helped make streaming video mainstream. Fifteen years later, YouTube is still quite popular.
When users upload a video to YouTube, viewers access the content through YouTube’s embedded player. Likewise, viewers can share the video content via a code that YouTube provides.
However, modern browsers now include embedded video players of their own. This means that it’s not always necessary for a website to provide the player.
Although YouTube is free, the platform poses significant challenges for serious broadcasters and businesses. Naming only a few, these drawbacks include third-party branding with your video, loss of ownership of your content, and lack of monetization features.
These limitations pose the need for an alternate solution for broadcasters who want to live stream on their own site.
3. Using HTML5 Video Streaming
The most modern method is HTML5 video streaming. This is the most innovative approach and it makes it possible to stream on just about any sort of device.
With HTML5 video streaming, the website hosting the content uses native HTTP to directly stream the media to viewers.
Content tags (e.g., <video> tag) are part of the HTML code. Thus, using the <video> tag creates a native HTML5 video player within your browser. These tags provide direction to the HTTP protocol as to what to do with this content. HTTP displays the text and an audio player plays audio content.
Also, HTML tags have various attributes, or parameters, which provide further detail on how to present the content. For example, with the <img> tag, you can specify the size of the image.
More recently, HTML5 has expanded on the media capabilities of basic HTML. For example, enhancements to the <img> tag and the new <video> tag provide content creators more flexibility and ease in presenting media content.
This flexibility allows broadcasters to deliver media without worrying about which browser a given visitor uses.
HTML5
Новая версия языка разметки сильно упростила процесс работы с мультимедиа, и в частности, с видео, принеся с собой замечательный тег для его вставки на страницы сайтов.
Самый простой код вставки видео будет таким:
<video src="film.webm"></video>
Где film.webm — ссылка на воспроизводимый ролик.
Но чтобы видео отображалось корректно и с заданными параметрами, код нужно поменять приблизительно на такой:
<video controls>

<source src="videos/play.mp4" type="video/mp4">

<source src="videos/play.ogv" type="video/ogg">

<source src="videos/play.webm" type="video/webm">

</video>
video — контейнер, отображающий ролик.
source — тег, содержащий информацию о видео
Обратите внимание, что в примере код содержит ссылки аж на три ролика разных форматов. Дело в том, что пока разные браузеры поддерживают не все кодеки, и возможные проблемы с воспроизведением решаются кодированием одного и того же ролика с помощью разных кодеков и одновременным добавлением файлов в тег.
controls — включает панель воспроизведения.
src — задаёт путь к проигрываемому ролику.
type — указывает тип контента, на который ссылается атрибут src.
Есть и дополнительные, не попавшие в код, атрибуты, позволяющие настроить проигрывание.
width — определяет ширину области отображения.
height — задаёт высоту.
autoplay — воспроизводит ролик автоматически после загрузки страницы.
loop — зацикливает воспроизведение.
preload — загружает видео вместе со страницей.
poster — содержит адрес изображения, которое будет показываться вместо ролика, если он вдруг по каким-либо причинам не воспроизведётся.
Примеры элементов
Следующий фрагмент кода HTML5 встроит видео WebM в веб-страницу.
<video src="movie.webm" poster="movie.jpg" controls>
	This is fallback content to display for user agents that do not support the video tag.
</video>
Атрибут «controls» позволяет собственному пользовательскому интерфейсу браузера управлять воспроизведением. В качестве альтернативы воспроизведением можно управлять с помощью JavaScript , который веб-дизайнер может использовать для создания пользовательского интерфейса. Необязательный атрибут «poster» указывает изображение, которое будет отображаться на месте видео перед началом воспроизведения. Его цель — представить видео.
Множественные источники
Поддержка видеоформатов различается в зависимости от браузера (см. Ниже), поэтому веб-страница может предоставлять видео в нескольких форматах. Для других функций иногда используется анализ браузера , который может быть подвержен ошибкам: любой веб-разработчик знает браузеры, что неизбежно будет неполным или устаревшим. Соответствующий браузер лучше всех знает, какие форматы он может использовать. Элемент «видео» поддерживает откат за счет указания нескольких источников. Используя любое количество элементов <source>, как показано ниже, браузер автоматически выберет файл для загрузки. В качестве альтернативы для достижения того же можно использовать функцию JavaScript canPlayType () . Атрибут «type» указывает тип MIME и, возможно, список кодеков, который помогает браузеру определить, может ли он декодировать файл, не загружая его. Тип MIME обозначает формат контейнера файла, а формат контейнера определяет интерпретацию строки кодека.
<video poster="poster.jpg" controls>
	<source src="av1.mp4" type='video/mp4; codecs="av01.0.00M.08, opus"'>
	<source src="avc.mp4" type='video/mp4; codecs="avc1.4D401E, mp4a.40.2"'>
	<source src="vp9.webm" type='video/webm; codecs="vp9.0, opus"'>
	<source src="theora.ogv" type='video/ogg; codecs="theora, vorbis"'>
	<p>This is fallback content to display for user agents that do not support the video tag.</p>
</video>
What is an HTML5 Video Player?
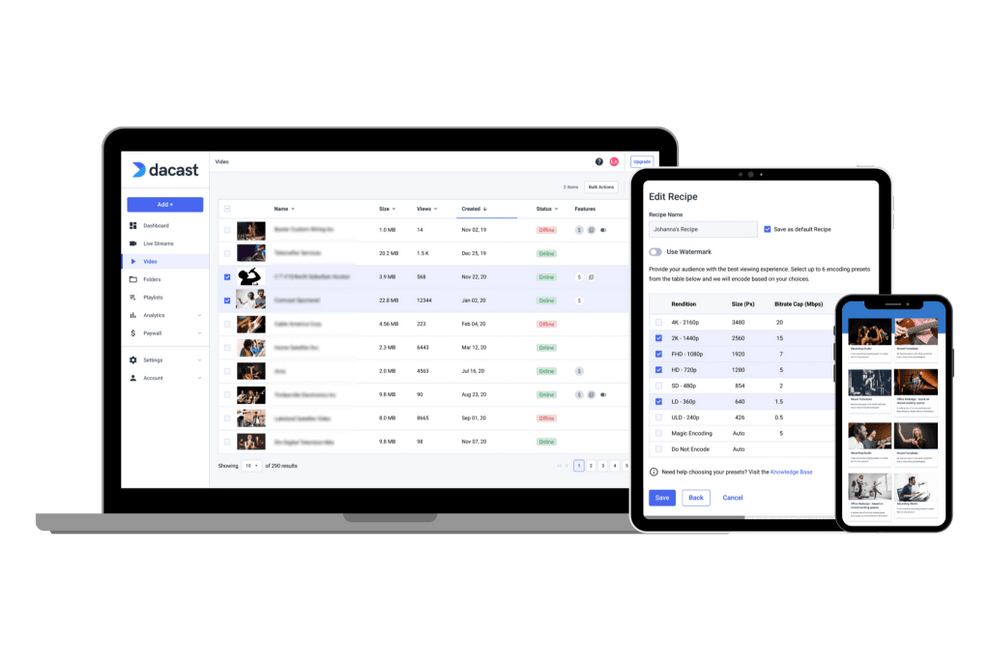 HTML5 video players have revolutionized the way we stream video.
Until relatively recently, the main method of delivering video via the internet was Adobe’s Flash video technology. However, in recent years, this protocol has been largely replaced by video delivery protocols like HLS streaming and played in HTML5 video players.
Today, Flash is considered an outdated streaming protocol. In fact, Chrome completely killed support for Flash at the end of 2020, and other major browsers are following suit.
As described above, HTML5 video streaming provides more modern streaming solutions for streaming videos directly from a website. Before HTML5, sites relied on embedded flash players to display videos to users.
With the HTML5 video element, the streaming process has been streamlined and improved for viewers and broadcasters alike. Furthermore, HTML5 videos can stream on all types of devices. Many mobile streaming devices, on the other hand, cannot handle flash videos.
Overall, HTML5 video streaming provides a simpler way to use video on web pages. Before its publication as a markup language in 2014, videos could only play in a browser with plugins like Flash. By using HTML5, developers no longer worry about which browser or which extension their visitors use.
Additionally, HTML5 simplifies video delivery by providing support for various attributes, elements, and tags to assist with the structure of your webpage. These support features include article and section and multimedia tags that support adding video and audio formats to your content.
HTML5 Video Support
The video tag () has been in HTML5 for several years now and all the modern browsers support it. The Video For Everybody Test Page illustrates its usage in clear terms.
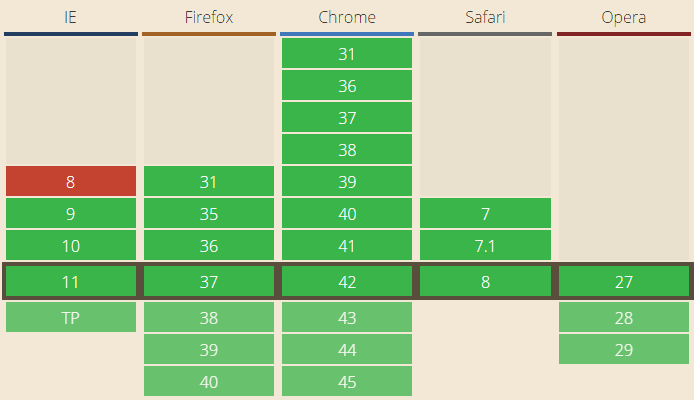
Browser support table for the <video> tag
Here’s how easy it is to add it to your page:
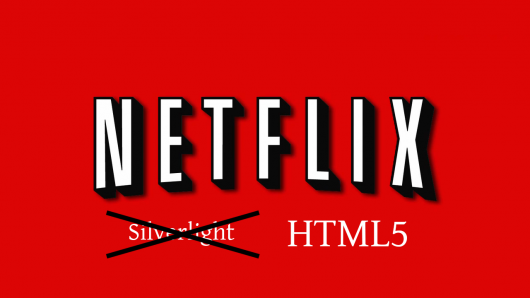
In fact, you likely use this every day. Netflix used to rely on Silverlight as their video player, but it now runs on HTML5 video. YouTube previously ran on Flash, but now much of its content is being served via HTML5. You know those video players you see on Xbox One (YouTube, Xbox Video, Netflix, etc.)? Yup, those are all HTML5 as well.
It’s even gotten a lot easier to test HTML5 video across browsers, especially on various versions of Internet Explorer and the new Project Spartan. To do this, you can get free virtual machines or test remotely on your Mac, iOS, Android, or Windows device.
Описание
HTML тег <video> позволяет добавить на страницу видеофайл. Некоторые браузеры не поддерживают видеофайлы некоторых форматов, поэтому необходимо предоставить видеофайл в нескольких форматах одновременно, для этого используются теги <source>, которые должны располагаться внутри элемента <video>.
Любой текст внутри элемента <video> будет отображен браузером в том случае, когда сам элемент или формат используемого видеофайла не поддерживается браузером.
Примечание: атрибутам controls, autoplay и loop при использовании не обязательно должны быть присвоены значения, эти атрибуты являются атрибутами булева типа, то есть если атрибут указан, то данная функция считается включенной, если не указан — выключенной.
A Note on Players
There are many to choose from. In this tutorial, I use Azure Media Services Player since it’s is a good one to start with, to get a feel for how media streaming works. It includes a number of sample videos, an a simple pull-down menu where you can select the various formats and see the tech and protection level behind each of them.
It provides support for a variety of formats out of the box, including:
- Smooth Streaming
- MPEG Dash
- HLS
- Progressive MP4
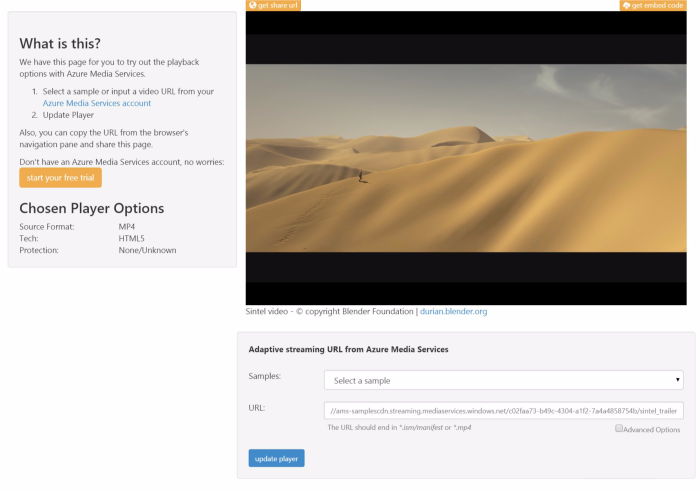
Best of all, you don’t even need to create your own player or page to test any of your video content. Simply change the URL to your content, and off you go.
You can also look at the open source video.js framework. It is similar to the Microsoft player (below), but also offers a bevy of options to make it easy to style. They have an excellent skin designer, too. If you’re less familiar with advanced CSS however, I’d shy away from this.