Autohotkey — программа для автоматизации действий на пк
Содержание:
- Имитируем клики мышкой
- Long Replacements
- Ending Characters
- Вставка специальных символов
- Hotstring Helper
- Examples
- Error Handling
- Optional Parameters
- Описание и возможности
- Control Flow
- Специальные клавиши
- Create a Script
- Script File Codepage [AHK_L 51+]
- Run as Administrator [AHK_L 57+]:
- Скрипты AutoHotKey для CS:GO
- Написание собственных сценариев
- Returning Values to Caller
- Учебное пособие по AutoHotkey
Имитируем клики мышкой
С кликами мышкой работать несколько сложнее, чем с использованием клавиатуры, так как здесь помимо кнопок есть еще и определенное месторасположение курсора, которое нужно указывать. В связи с этим пользователь сначала должен определить координаты X и Y того места на экране, куда должно отправляться созданное событие. Делается это при помощи встроенной в программу утилиты под названием Active Window Info.
1. Для начала вам следует запустить саму программу из трея на заранее открытом скрипте. Также вы можете просто кликнуть меню «Пуск», выбрать «Все программы» и там в меню «AutoHotKey» выбрать «Active Window Info». Сразу стоит сказать о том, что данное окно будет автоматически располагаться поверх остальных, что требуется для удобства работы с утилитой.

2. Запустите подопытное окно программы. Для этого нужно кликнуть по заголовку или же использовать стандартную комбинацию клавиш «Alt+Tab».
3. Перемещайте курсор в то место, где нужно будет осуществлять нужное вам событие, после чего посмотрите уже в окно Active Window Info. Теперь записывайте координаты, которые показаны в окне этой программы (их можно найти в строчке «On Screen» или же в строке «In Active Window») в зависимости от того, какая область конкретно на данный момент вас интересует.
Стоит отметить тот факт, что у пользователей Windows XP есть возможность использования комбинации клавиш «Shift+Alt+Tab», при помощи которой окно Window Spy замораживается, а пользователь переходит к нему для копирования нужных цифр.
4. Ставьте полученные вами координаты в скрипте после команды «MouseClick», при этом вставлять нужно только через запятую и после того, как будет обозначена кнопка мыши.
Выглядеть все это может примерно так:
В данном случае «MouseClick» – это команда, которая предназначается для щелчков мыши при помощи AutoHotKey, но для ее нормальной работы нужно будет задать также три параметра через запятую. Первый указывает кнопку мыши (можно писать Left или Right целиком, а можно просто использовать буквы L и R. M указывает на необходимость клика по скроллу). Остальные параметры представляют собой координаты X и Y того места на экране, в которое нужно будет кликнуть.
Также есть команда «MouseMove», при помощи которой курсор просто перемещается в определенную область на экране. Пользоваться ей гораздо проще, ведь нужно просто ввести команду и указать координаты, например:
Помимо всего прочего, программа может использоваться для перетаскивания мышью каких-либо объектов, что осуществляется при использовании команды «MouseClickDrag». В этой команде уже нужно будет вводить сразу пять параметров, первый из которых представляет собой клик нужной кнопкой мыши, второй и третий включают в себя стартовые координаты, а четвертый и пятый – последние, то есть то место, где мышка должна быть отпущена.
Команда может выглядеть примерно следующим образом:
Таким образом, вы можете экспериментировать с самыми разнообразными командами, и доводить автоматизм различных процедур до самых невероятных вершин.
Long Replacements
Hotstrings that produce a large amount of replacement text can be made more readable and maintainable by using a . For example:
::text1::
(
Any text between the top and bottom parentheses is treated literally, including commas and percent signs.
By default, the hard carriage return (Enter) between the previous line and this one is also preserved.
    By default, the indentation (tab) to the left of this line is preserved.
)
See for how to change these default behaviors. The presence of a continuation section also causes the hotstring to default to . The only way to override this special default is to specify the in each hotstring that has a continuation section (e.g. ).
Ending Characters
Unless the is in effect, you must type an ending character after a hotstring’s abbreviation to trigger it. Ending characters initially consist of the following: -()[]{}’:;»/\,.?!`n `t (note that `n is Enter, `t is Tab, and there is a plain space between `n and `t). This set of characters can be changed by editing the following example, which sets the new ending characters for all hotstrings, not just the ones beneath it:
#Hotstring EndChars -()[]{}:;'"/\,.?!`n `t
: The ending characters can be changed while the script is running by calling the Hotstring function as demonstrated below:
Hotstring("EndChars", "-()[]{}:;")
Вставка специальных символов
Хотя на клавиатуре присутствуют некоторые символы, такие как «@» или «№», существует множество других, набирать которые довольно утомительно, в особенности если приходится иметь с ними дело каждый день. Написав всего одну строку кода AHK, вы сможете легко вставлять их без поиска кодов с «Alt» или копирования с интернет-ресурсов.
Используйте шаблон кода, представленный ниже, чтобы назначать горячие клавиши для нужных вам символов. Слева находится комбинация, сам символ заключен в фигурные скобки. К примеру, чтобы при нажатии сочетания клавиш «Alt» + «Й» выводился символ торговой марки, понадобится такой код:
!й::SendInput {}
Список обозначений AutoHotkey:
^ для «CTRL»; ! для «ALT»; # для «Windows»; + для «Shift».
Hotstring Helper
Andreas Borutta suggested the following script, which might be useful if you are a heavy user of hotstrings. By pressing Win+H (or another hotkey of your choice), the currently selected text can be turned into a hotstring. For example, if you have «by the way» selected in a word processor, pressing Win+H will prompt you for its abbreviation (e.g. btw) and then add the new hotstring to the script. It will then reload the script to activate the hotstring.
Note: The Hotstring function can be used to create new hotstrings without reloading. Take a look at the in the example section of the function’s page to see how this could be done.
#h::  ; Win+H hotkey
; Get the text currently selected. The clipboard is used instead of
; "ControlGet Selected" because it works in a greater variety of editors
; (namely word processors).  Save the current clipboard contents to be
; restored later. Although this handles only plain text, it seems better
; than nothing:
AutoTrim Off  ; Retain any leading and trailing whitespace on the clipboard.
ClipboardOld := ClipboardAll
Clipboard := ""  ; Must start off blank for detection to work.
Send ^c
ClipWait 1
if ErrorLevel  ; ClipWait timed out.
    return
; Replace CRLF and/or LF with `n for use in a "send-raw" hotstring:
; The same is done for any other characters that might otherwise
; be a problem in raw mode:
StringReplace, Hotstring, Clipboard, ``, ````, All  ; Do this replacement first to avoid interfering with the others below.
StringReplace, Hotstring, Hotstring, `r`n, ``r, All  ; Using `r works better than `n in MS Word, etc.
StringReplace, Hotstring, Hotstring, `n, ``r, All
StringReplace, Hotstring, Hotstring, %A_Tab%, ``t, All
StringReplace, Hotstring, Hotstring, `;, ```;, All
Clipboard := ClipboardOld  ; Restore previous contents of clipboard.
; This will move the input box's caret to a more friendly position:
SetTimer, MoveCaret, 10
; Show the input box, providing the default hotstring:
InputBox, Hotstring, New Hotstring, Type your abreviation at the indicated insertion point. You can also edit the replacement text if you wish.`n`nExample entry: :R:btw`::by the way,,,,,,,, :R:`::%Hotstring%
if ErrorLevel  ; The user pressed Cancel.
    return
if InStr(Hotstring, ":R`:::")
{
    MsgBox You didn't provide an abbreviation. The hotstring has not been added.
    return
}
; Otherwise, add the hotstring and reload the script:
FileAppend, `n%Hotstring%, %A_ScriptFullPath%  ; Put a `n at the beginning in case file lacks a blank line at its end.
Reload
Sleep 200 ; If successful, the reload will close this instance during the Sleep, so the line below will never be reached.
MsgBox, 4,, The hotstring just added appears to be improperly formatted.  Would you like to open the script for editing? Note that the bad hotstring is at the bottom of the script.
IfMsgBox, Yes, Edit
return

MoveCaret:
if not WinActive("New Hotstring")
    return
; Otherwise, move the input box's insertion point to where the user will type the abbreviation.
Send {Home}{Right 3}
SetTimer, MoveCaret, Off
return
Examples
Creates a Ctrl-Alt-Z hotkey.
Hotkey, ^!z, MyLabel
return

MyLabel:
MsgBox You pressed %A_ThisHotkey%.
return
Makes RCtrl & RShift operate like Alt-Tab.
Hotkey, RCtrl & RShift, AltTab
Re-enables the Win-C hotkey.
Hotkey, #c, On
Disables the Shift-Win-C hotkey.
Hotkey, $+#c, Off
Changes a hotkey to allow 5 threads.
Hotkey, ^!a, , T5
Creates a Ctrl-Alt-C hotkey that works only in Notepad.
Hotkey, IfWinActive, ahk_class Notepad
Hotkey, ^!c, MyLabelForNotepad
Creates a GUI that allows to register primitive three-key combination hotkeys.
Gui Add, Text, xm, Prefix key:
Gui Add, Edit, yp x100 w100 vPrefix, Space
Gui Add, Text, xm, Suffix hotkey:
Gui Add, Edit, yp x100 w100  vSuffix, f & j
Gui Add, Button, Default, Register
Gui Show
return

ButtonRegister() {
    global
    Gui Submit, NoHide
    local fn
    fn := Func("HotkeyShouldFire").Bind(Prefix)
    Hotkey If, % fn
    Hotkey % Suffix, FireHotkey
}

HotkeyShouldFire(prefix, thisHotkey) {
    return GetKeyState(prefix)
}

FireHotkey() {
    MsgBox %A_ThisHotkey%
}

GuiClose:
GuiEscape:
ExitApp
Error Handling
: This command is able to throw an exception on failure. For more information, see .
ErrorLevel is changed only when: 1) the first parameter is IfWinActive/Exist, in which case it is set to 1 if there was a problem or 0 otherwise; or 2) the word UseErrorLevel is present in the Options parameter.
: If the first parameter is «If», an exception is thrown if the second parameter is invalid or a memory allocation fails. ErrorLevel is not set in those cases, but is still set to 0 on success.
| Error | Description |
|---|---|
| 1 | The Label parameter specifies a nonexistent label name. |
| 2 | The KeyName parameter specifies one or more keys that are either not recognized or not supported by the current keyboard layout/language. |
| 3 | Unsupported prefix key. For example, using the mouse wheel as a prefix in a hotkey such as is not supported. |
| 4 | The KeyName parameter is not suitable for use with the actions. A combination of (at most) two keys is required. For example: . |
| 5 | The command attempted to modify a nonexistent hotkey. |
| 6 | The command attempted to modify a nonexistent of an existing hotkey. To solve this, use to set the criteria to match those of the hotkey to be modified. |
| 98 | Creating this hotkey would exceed the limit of hotkeys per script (however, each hotkey can have an unlimited number of , and there is no limit to the number of hotstrings). The limit was raised from 700 to 1000 in , and to 32762 in . |
| 99 | Out of memory. This is very rare and usually happens only when the operating system has become unstable. |
Tip: The UseErrorLevel option can be used to test for the existence of a hotkey variant. For example:
Hotkey, ^!p,, UseErrorLevel
if ErrorLevel in 5,6
    MsgBox The hotkey does not exist or it has no variant for the current IfWin criteria.
Optional Parameters
When defining a function, one or more of its parameters can be marked as optional. This is done by appending (in or later) or , followed by the parameter’s default value, which must be one of the following: , , a literal integer, a literal floating point number, or a quoted/literal string such as «fox» or «» (but strings in versions prior to support only «»).
The use of (without a colon) is permitted for backward-compatibility, but not recommended, and will not be permitted by AutoHotkey v2. Regardless of which operator is used, default values which are strings must always be enclosed in quote marks.
The following function has its Z parameter marked optional:
Add(X, Y, Z:=0) {
    return X + Y + Z
}
When the caller passes three parameters to the function above, Z’s default value is ignored. But when the caller passes only two parameters, Z automatically receives the value 0.
It is not possible to have optional parameters isolated in the middle of the parameter list. In other words, all parameters that lie to the right of the first optional parameter must also be marked optional. : Optional parameters may be omitted from the middle of the parameter list when calling the function, as shown below. For dynamic function calls and method calls, this requires .
MyFunc(1,, 3)
MyFunc(X, Y:=2, Z:=0) {  ; Note that Z must still be optional in this case.
    MsgBox %X%, %Y%, %Z%
}
: also support default values; for example: . Whenever the caller omits such a parameter, the function creates a local variable to contain the default value; in other words, the function behaves as though the keyword «ByRef» is absent.
Описание и возможности
Итак, что же это за приложение и для чего оно нужно? АвтоХоткей – это специальная утилита, которая воспроизводит заранее написанные скрипты или как еще их называют бинды. Рассмотрим основные и дополнительные возможности ПО, для того чтобы вы поняли его назначение:
- Какой-либо горячей кнопкой или кликом мыши вы можете запустить заранее запрограммированный макрос, который, в свою очередь, выполнит целую серию событий.
- На любые кнопки клавиатуры, игрового джойстика или мыши мы можем назначить отдельные макросы. При этом поддерживается не только обычный, но и двойной клик.
- Собственный скриптовый язык позволяет, например, создать функционал для автоматической замены введенного текста.
- Поддерживается переназначение клавиш на клавиатуре, мыши или игровом контролере.
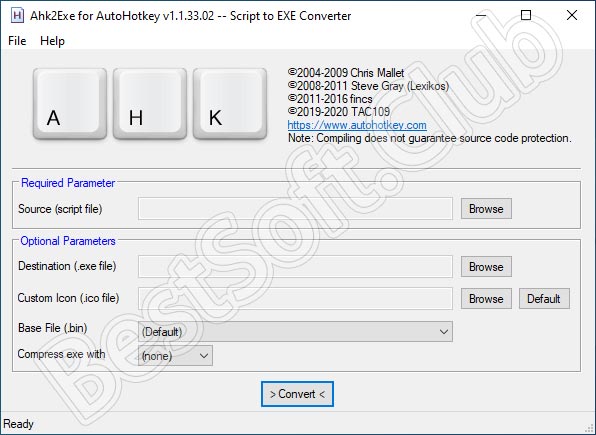
- Любой скрипт, который написал пользователь, может быть преобразован в обычной EXE-файл. Это позволит запускать его уже без участия программы AutoHotkey.
Утилита, о которой рассказывается ниже, обладает и другими возможностями. Подробнее познакомиться с ними можно при помощи и прикрепленного в конце странички обучающего видео.
Control Flow
Control flow is the order in which individual statements are executed. Normally statements are executed sequentially from top to bottom, but a control flow statement can override this, such as by specifying that statements should be executed repeatedly, or only if a certain condition is met.
- Statement
-
A statement is simply the smallest standalone element of the language that expresses some action to be carried out. In AutoHotkey, statements include commands, assignments, function calls and other expressions. However, directives, labels (including hotkeys and hotstrings), and declarations without assignments are not statements; they are processed when the program first starts up, before the script executes.
- Execute
-
Carry out, perform, evaluate, put into effect, etc. Execute basically has the same meaning as in non-programming speak.
- Body
-
The body of a control flow statement is the statement or group of statements to which it applies. For example, the body of an is executed only if a specific condition is met.
For example, consider this simple set of instructions:
- Open Notepad
- Wait for Notepad to appear on the screen
- Type «Hello, world!»
We take one step at a time, and when that step is finished, we move on to the next step. In the same way, control in a program or script usually flows from one statement to the next statement. But what if we want to type into an existing Notepad window? Consider this revised set of instructions:
- If Notepad is not running:
- Open Notepad
- Wait for Notepad to appear on the screen
- Otherwise:
- Activate Notepad
- Type «Hello, world!»
So we either open Notepad or activate Notepad depending on whether it is already running. #1 is a conditional statement, also known as an if statement; that is, we execute its body (#1.1 — #1.2) only if a condition is met. #2 is an else statement; we execute its body (#2.1) only if the condition of a previous if statement (#1) is not met. Depending on the condition, control flows one of two ways: #1 (if true) → #1.1 → #1.2 → #3; or #1 (if false) → #2 (else) → #2.1 → #3.
The instructions above can be translated into the code below:
if (not WinExist("ahk_class Notepad"))
{
    Run Notepad
    WinWait ahk_class Notepad
}
else
    WinActivate ahk_class Notepad
Send Hello`, world!
In our written instructions, we used indentation and numbering to group the statements. Scripts work a little differently. Although indentation makes code easier to read, in AutoHotkey it does not affect the grouping of statements. Instead, statements are grouped by enclosing them in braces, as shown above. This is called a block.
For details about syntax — that is, how to write or recognise control flow statements in AutoHotkey — see .
Специальные клавиши
При необходимости вы можете сделать так, чтобы программа автоматически нажимала специальные клавиши, такие как «Ctrl», «Shift» и «Alt». К примеру, используя команду «Send ^с!{tab}», вы делаете так, чтобы программа использовала автоматическую вставку, а потом сразу же переключалась на другое окно.
Символ «^» в данном случае указывает программе использовать сначала клавишу «Ctrl», в то время как «!» представляет собой клавишу «Alt». Соответственно, команда «{tab}», как и говорилось выше, дает программе установку использовать кнопку «Tab». Чтобы не вызвать никаких проблем и конфликтов в процессе работы программы, вам следует использовать кириллицу, так как клавиши будут чаще всего совпадать с нынешней раскладкой клавиатуры.
Более подробно ознакомиться со списком специальных символов вы сможете непосредственно через меню «Справка» в самой программе.
Чтобы обеспечить более быструю печать в окне любой программы, вы можете воспользоваться так называемыми горячими строчками. По сути, это различные макросы, которые позволяют вам писать одинаковые сообщения, но вместо того, чтобы тратить на них большое количество времени, вполне достаточно будет нажать определенную комбинацию клавиш.
К примеру, можно сделать так, чтобы сокращение «бгф» использовалось для ввода в чат длинной фразы, такой как, например, «берегись, кинул гранату, это флешка». Делается это с помощью следующей команды:
При этом сразу стоит отметить, что для работоспособности скрипта нужно будет после введенного сокращения нажать на «пробел» или просто поставить запятую.
Create a Script
There are a couple of common ways to create a script file:
- In Notepad (or a of your choice), save a file with the filename extension. On some systems you may need to enclose the name in quotes to ensure the editor does not add another extension (such as .txt).
Be sure to save the file as UTF-8 with BOM if it will contain non-ASCII characters. For details, see the .
- In Explorer, right-click in empty space in the folder where you want to save the script, then select New and AutoHotkey Script. You can then type a name for the script (taking care not to erase the extension if it is visible).
See Scripting Language for details about how to write a script.
Script File Codepage [AHK_L 51+]
In order for non-ASCII characters to be read correctly from file, the encoding used when the file was saved (typically by the text editor) must match what AutoHotkey uses when it reads the file. If it does not match, characters will be decoded incorrectly. AutoHotkey uses the following rules to decide which encoding to use:
- If the file begins with a UTF-8 or UTF-16 (LE) byte order mark, the appropriate codepage is used and the switch is ignored.
- If the switch is passed on the command-line, codepage n is used. For a list of possible values, see Code Page Identifiers.
Note: The «Default to UTF-8» option in the AutoHotkey installer adds to the command line for all scripts launched via the shell (Explorer).
- In all other cases, the system default ANSI codepage is used.
Note that this applies only to script files loaded by AutoHotkey, not to file I/O within the script itself. FileEncoding controls the default encoding of files read or written by the script, while IniRead and IniWrite always deal in UTF-16 or ANSI.
As all text is converted (where necessary) to the , characters which are invalid or don’t exist in the native codepage are replaced with a placeholder: ANSI ‘?’ or Unicode ‘�’. In Unicode builds, this should only occur if there are encoding errors in the script file or the codepages used to save and load the file don’t match.
RegWrite may be used to set the default for scripts launched from Explorer (e.g. by double-clicking a file):
; Uncomment the appropriate line below or leave them all commented to
;   reset to the default of the current build.  Modify as necessary:
; codepage := 0        ; System default ANSI codepage
; codepage := 65001    ; UTF-8
; codepage := 1200     ; UTF-16
; codepage := 1252     ; ANSI Latin 1; Western European (Windows)
if (codepage != "")
    codepage := " /CP" . codepage
cmd="%A_AhkPath%"%codepage% "`%1" `%*
key=AutoHotkeyScript\Shell\Open\Command
if A_IsAdmin    ; Set for all users.
    RegWrite, REG_SZ, HKCR, %key%,, %cmd%
else            ; Set for current user only.
    RegWrite, REG_SZ, HKCU, Software\Classes\%key%,, %cmd%
This assumes AutoHotkey has already been installed. Results may be less than ideal if it has not.
Run as Administrator [AHK_L 57+]:
For an executable file, the *RunAs verb is equivalent to selecting Run as administrator from the right-click menu of the file. For example, the following code attempts to restart the current script as admin:
full_command_line := DllCall("GetCommandLine", "str")

if not (A_IsAdmin or RegExMatch(full_command_line, " /restart(?!\S)"))
{
    try
    {
        if A_IsCompiled
            Run *RunAs "%A_ScriptFullPath%" /restart
        else
            Run *RunAs "%A_AhkPath%" /restart "%A_ScriptFullPath%"
    }
    ExitApp
}

MsgBox A_IsAdmin: %A_IsAdmin%`nCommand line: %full_command_line%
If the user cancels the UAC dialog or Run fails for some other reason, the script will simply exit.
Using ensures that a single instance prompt is not shown if the new instance of the script starts before ExitApp is called.
If UAC is disabled, *RunAs will launch the process without elevating it. Checking for in the command line ensures that the script does not enter a runaway loop in that case. Note that is a built-in switch, so is not included in the .
The example can be modified to fit the script’s needs:
- If the script absolutely requires admin rights, check A_IsAdmin a second time in case *RunAs failed to elevate the script (i.e. because UAC is disabled).
- To keep the script running even if the user cancels the UAC prompt, move ExitApp into the try block.
- To keep the script running even if it failed to restart (i.e. because the script file has been changed or deleted), remove ExitApp and use RunWait instead of Run. On success, causes the new instance to terminate the old one. On failure, the new instance exits and RunWait returns.
: If UAC is enabled, the AutoHotkey installer registers the RunAs verb for .ahk files, which allows to launch a script as admin with the default executable.
Скрипты AutoHotKey для CS:GO
Bhop
Bhop (распрыжка) — это крутой скрипт для отработки упражнений, когда вы освоите его, подумайте о распрыжке с колесом прокрутки.
F11 для включения и отключения. Кнопка End дял полного отключения.
VAC вас НИКОГДА не обнаружит.
Autofire
Autofire не очень практичен для конкурентного игрового процесса, но с DM и Casual это интересно.
Они безопасны для VAC, но их не рекомендуется использовать в конкурентных состязаниях или на пользовательских серверах, их обнаруживает пользовательский античит.
Чтобы поставить скрипт на паузу нажмите F6.
Ultimate CS:GO Multiscript
Это НЕ чит, он не будет вводить или делать что-либо с CS:GO, он просто симулирует события мыши/клавиатуры.

Характеристики
- Удивительный графический интерфейс для быстрого и простого отображения.
- Авто-купить оружие, можно настроить в графическом интерфейсе
- Burst, 1x Tap, 2x режима огня
- Rapid Fire (Autofire) для ваших пистолетов/ружей
- Вертикальный контроль отдачи (в сочетании с автопожаром для пистолета Norecoil)
- Bhop (распрыжка)
- Медленный авто огонь для Deagles
- Авто нож для лучших ножевых комбо!
Горячие кнопки
- На цифровом блоке клавиатуры 1-3: Выберите пресет для автоматической покупки
- На цифровом блоке клавиатуры 4: авто огонь
- На цифровом блоке клавиатуры 5: авто нож
- На цифровом блоке клавиатуры 6: одно нажатие = взрыв, удерживайте мышь для спрея с катушкой
- На цифровом блоке клавиатуры 7-9: 1x Tap, 2x Tap, Взрыв
- Правый Ctrl: режим огня по умолчанию
- Правый Alt: переключить «без отдачи»
- CapsLock: переключить Bhop (раскрыжка)
- Правый Shift: сделать norecoil (без отдачи) непротиворечивым (только для cz auto)
Пролистните до Code: и разверните Spoiler:
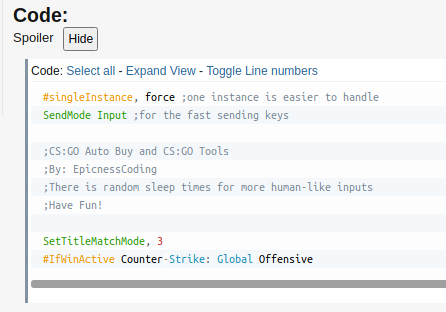
Скрипт длинный, поэтому убедитесь, что полностью скопировали его.
Написание собственных сценариев
В прошлом мы уже много рассказывали об AutoHotkey, в том числе о том, как улучшить Windows с помощью специальных скриптов AHK.
— поэтому я буду кратко о его использовании здесь. Если вы только начинаете работать с AHK, вы, вероятно, больше всего выиграете от расширения текста
,
По сути, расширение текста позволяет вам набрать немного текста, который автоматически расширяется. У вас есть повторяющиеся письма
Вы отправляете несколько раз в день? Как часто вы вводите свой адрес электронной почты при входе на веб-сайты и тому подобное? Вместо того, чтобы тратить время на ввод этих элементов каждый раз, настройте расширение текста и сделайте его более продуктивным.
Если вы загрузили скрипт автозамены выше, внизу есть место, куда вы можете добавить любые собственные фразы, что является идеальным местом для добавления однострочного расширения. Если вы не используете этот скрипт, просто создайте новый скрипт для ваших записей.
Все довольно просто: введите две двоеточия, а затем текст горячей клавиши. После еще двух двоеточий введите фразу для расширения. Итак, если вы хотите, чтобы при наборе «@@» автоматически расширялся ваш адрес электронной почты, сценарий был бы:
Возможностей здесь много — вы можете сделать горячую клавишу CTRL + ALT + C выплевывать консервированные сообщения электронной почты, которые вы вводите несколько раз в день, или любое количество других задач, имеющих отношение к вашей работе:
После того, как вы настроили какое-либо расширение текста, вы можете начать переназначение ключей, если вы обнаружите, что некоторые из них бесполезны в их текущем состоянии.
Хотите, чтобы кнопка «Вставка» была ярлыком для «Копировать»? Вы можете сделать это!
Проверьте учебники AutoHotkey для получения дополнительной информации.
Returning Values to Caller
As described in , a function may optionally return a value to its caller.
Test := returnTest()
MsgBox % Test

returnTest() {
    return 123
}
If you want to return extra results from a function, you may also use :
returnByRef(A,B,C)
MsgBox % A "," B "," C

returnByRef(ByRef val1, ByRef val2, ByRef val3)
{
    val1 := "A"
    val2 := 100
    val3 := 1.1
    return
}
: and can be used to return multiple values or even named values:
Test1 := returnArray1()
MsgBox % Test1 "," Test1

Test2 := returnArray2()
MsgBox % Test2 "," Test2

Test3 := returnObject()
MsgBox % Test3.id "," Test3.val

returnArray1() {
    Test :=
    return Test
}

returnArray2() {
    x := 456
    y := "EFG"
    return
}

returnObject() {
    Test := {id: 789, val: "HIJ"}
    return Test
}
Учебное пособие по AutoHotkey
Прежде всего, вам нужно загрузить AutoHotKey и установить его на свой компьютер. Его значок программы будет находиться в системном трее, откуда вы можете управлять всеми вашими сценариями. Вы также можете приостановить AutoHotkey здесь в течение определенного периода времени или даже выйти, если вам не нужно запускать скрипты
Обратите внимание, что при выходе из приложения в системном лотке ваши скрипты не будут работать
Когда вы устанавливаете программу AutoHotKey, вы получаете возможность видеть образцы сценариев в «Блокноте». Это говорит SHOW README. Если вы установите флажок и нажмите Завершить после установки, откроется окно справки Windows, в котором вы найдете подробные инструкции по использованию программы.
ВАЖНО: Создание сценариев в «Блокноте» и сохраните их с расширением .AHK, чтобы они работали. Выберите «ВСЕ ФАЙЛЫ» в разделе «Тип» (второй раскрывающийся список ниже «Текстовое поле имени файла»)
Он показывает *. * В соответствующем текстовом поле, и там вам нужно ввести AHK вместо TXT. Если вы сохраняете как TXT, сценарий не будет работать.
Как использовать скрипты AutoHotkey
Ниже приведен краткий учебник по использованию AutoHotkey.
Специальные клавиши (CTRL, ALT, SHIFT, WINDOWS KEY)
Когда вы создаете скрипты, вы назначаете их клавишам. В большинстве случаев вам необходимо назначить их комбинации специальных клавиш, за которыми следуют обычные клавиши. Специальные клавиши в этом отношении — WINDOWS KEY, CTRL, SHIFT и ALT. Вы можете использовать один или несколько специальных клавиш для назначения ваших скриптов. Например, вы можете назначить скрипт CTRL + SHIFT + S. В этом случае вам нужно ввести специальные ключи в формате, предоставленном AutoHotKeys.
CTRL представлен символом ^
SHIFT представлен +
ALT представлен символом!
Ключ Windows представлен #
:: part заканчивает комбинацию горячих клавиш и сценарий следует
Для начала вам сначала нужно ввести специальную комбинацию клавиш, которая активирует скрипт вы создали. Например, если вы хотите назначить CTRL + SHIFT + S для запуска Google, ваш скрипт будет выглядеть следующим образом:
^ + S :: Запустить google.com
Специальные слова или команды
Чтобы запустить программы или веб-сайта, используйте RUN . Например, если вы создаете следующее:
! ^ F :: Запустить блокнот
С помощью приведенного выше сценария, когда вы нажимаете ALT + SHIFT + F, запускается Блокнот. RUN — это ключевое слово, которое помогает запускать программу или запускать веб-сайт. В следующем примере показано, как горячая клавиша открывает Google в вашей программе по умолчанию, а затем запускает «Блокнот».
^ + E :: Запустить google.com Запустить Notepad Return
Все четыре строки выше — это один скрипт, который активируется с помощью CTRL + SHIFT + E. Слово RETURN — это еще одно ключевое слово, которое указывает конец скрипта, когда вы используете несколько строк. Всякий раз, когда вы создаете скрипт с несколькими строками, вы должны использовать RETURN в конце скрипта, чтобы AutoHotKey знал, что скрипт заканчивается здесь.
Вы можете добавить столько команд, которые вы хотите, в один файл AHK, но помните использовать RETURN в конце последнего скрипта в файле AHK. Вы должны запустить файл AHK, дважды щелкнув его, прежде чем вы сможете использовать скрипты
Другим ключевым словом, которое стоит использовать, является SEND . Он посылает нажатия клавиш в оболочку, и вы можете использовать его для создания таких вещей, как подписи и т. Д. См. Следующий пример.
^! S :: Отправить приветствия {ENTER} Arun Kumar Return
В приведенном выше скрипте, когда я нажимаю CTRL + ALT + S, он вставляет С уважением , а затем клавишу Enter (для изменения строки), а затем вставьте Арун Кумар . В приведенном выше примере показано, как ввести ключ ENTER. Клавиша ENTER всегда включена внутри фигурных скобок {}.
Аналогично, если вы хотите ввести TAB, это должно быть {TAB}. Аналогично, клавиша пробела будет . Для ввода пробела вам не нужно использовать . Он автоматически примет в SPACE, когда вы вводите клавишу SPACE в скрипте, как в приведенном выше примере. В этом примере за Arun следует пробел, а затем Kumar .
Этот учебник не является исчерпывающим, но этого достаточно, чтобы вы начали с программы для создания коротких сценариев AutoHotKey.
Теперь читаем: Отображение глобальных горячих клавиш в Windows.